A 15ft Pram for Dinghy Cruising
20180625
20180626
20180627
20180628
20180629
20180902
20180915
20181014
20190208
20190422
20190510
20190511
20190512
20190525
20190601
20190803
20190804
20190805
20190807
20190811
20190819
20190820
20190821
20190822
20190823
20190828
20190908
20190922
20200216
20200603
20200612
20200712
20200718
20200719
20200727
20200822
20200905
20200910
20200911
20200912
20200913
20200920
20210305
20210509
20210724
20210905
20210912
20211003
20220430
20220508
20220603
20220618
20220821
20220828
20220904
20220911
20221009
20230423
20230520
20230528
20230625
20230805
20230806
20230810
20230903
20230906
20230910
20230911
20231001
20231008
20240423
20240515
20240603
20240614
20240623
20240710
20240714
20240716
20240720
20240723
20240725
20240726
20240727
20240730
20240908
20240915
20240929
20241007
20241019
20241021
20241110
20250420
20250421
20250422
20250428
20250504
20250505
20250622
20250630
20250707
20250716
20250717
20250718
20250719
20250720
20250721
20250724
20250725
20250825
20250907
20250910
20251019
<<
20251019 |
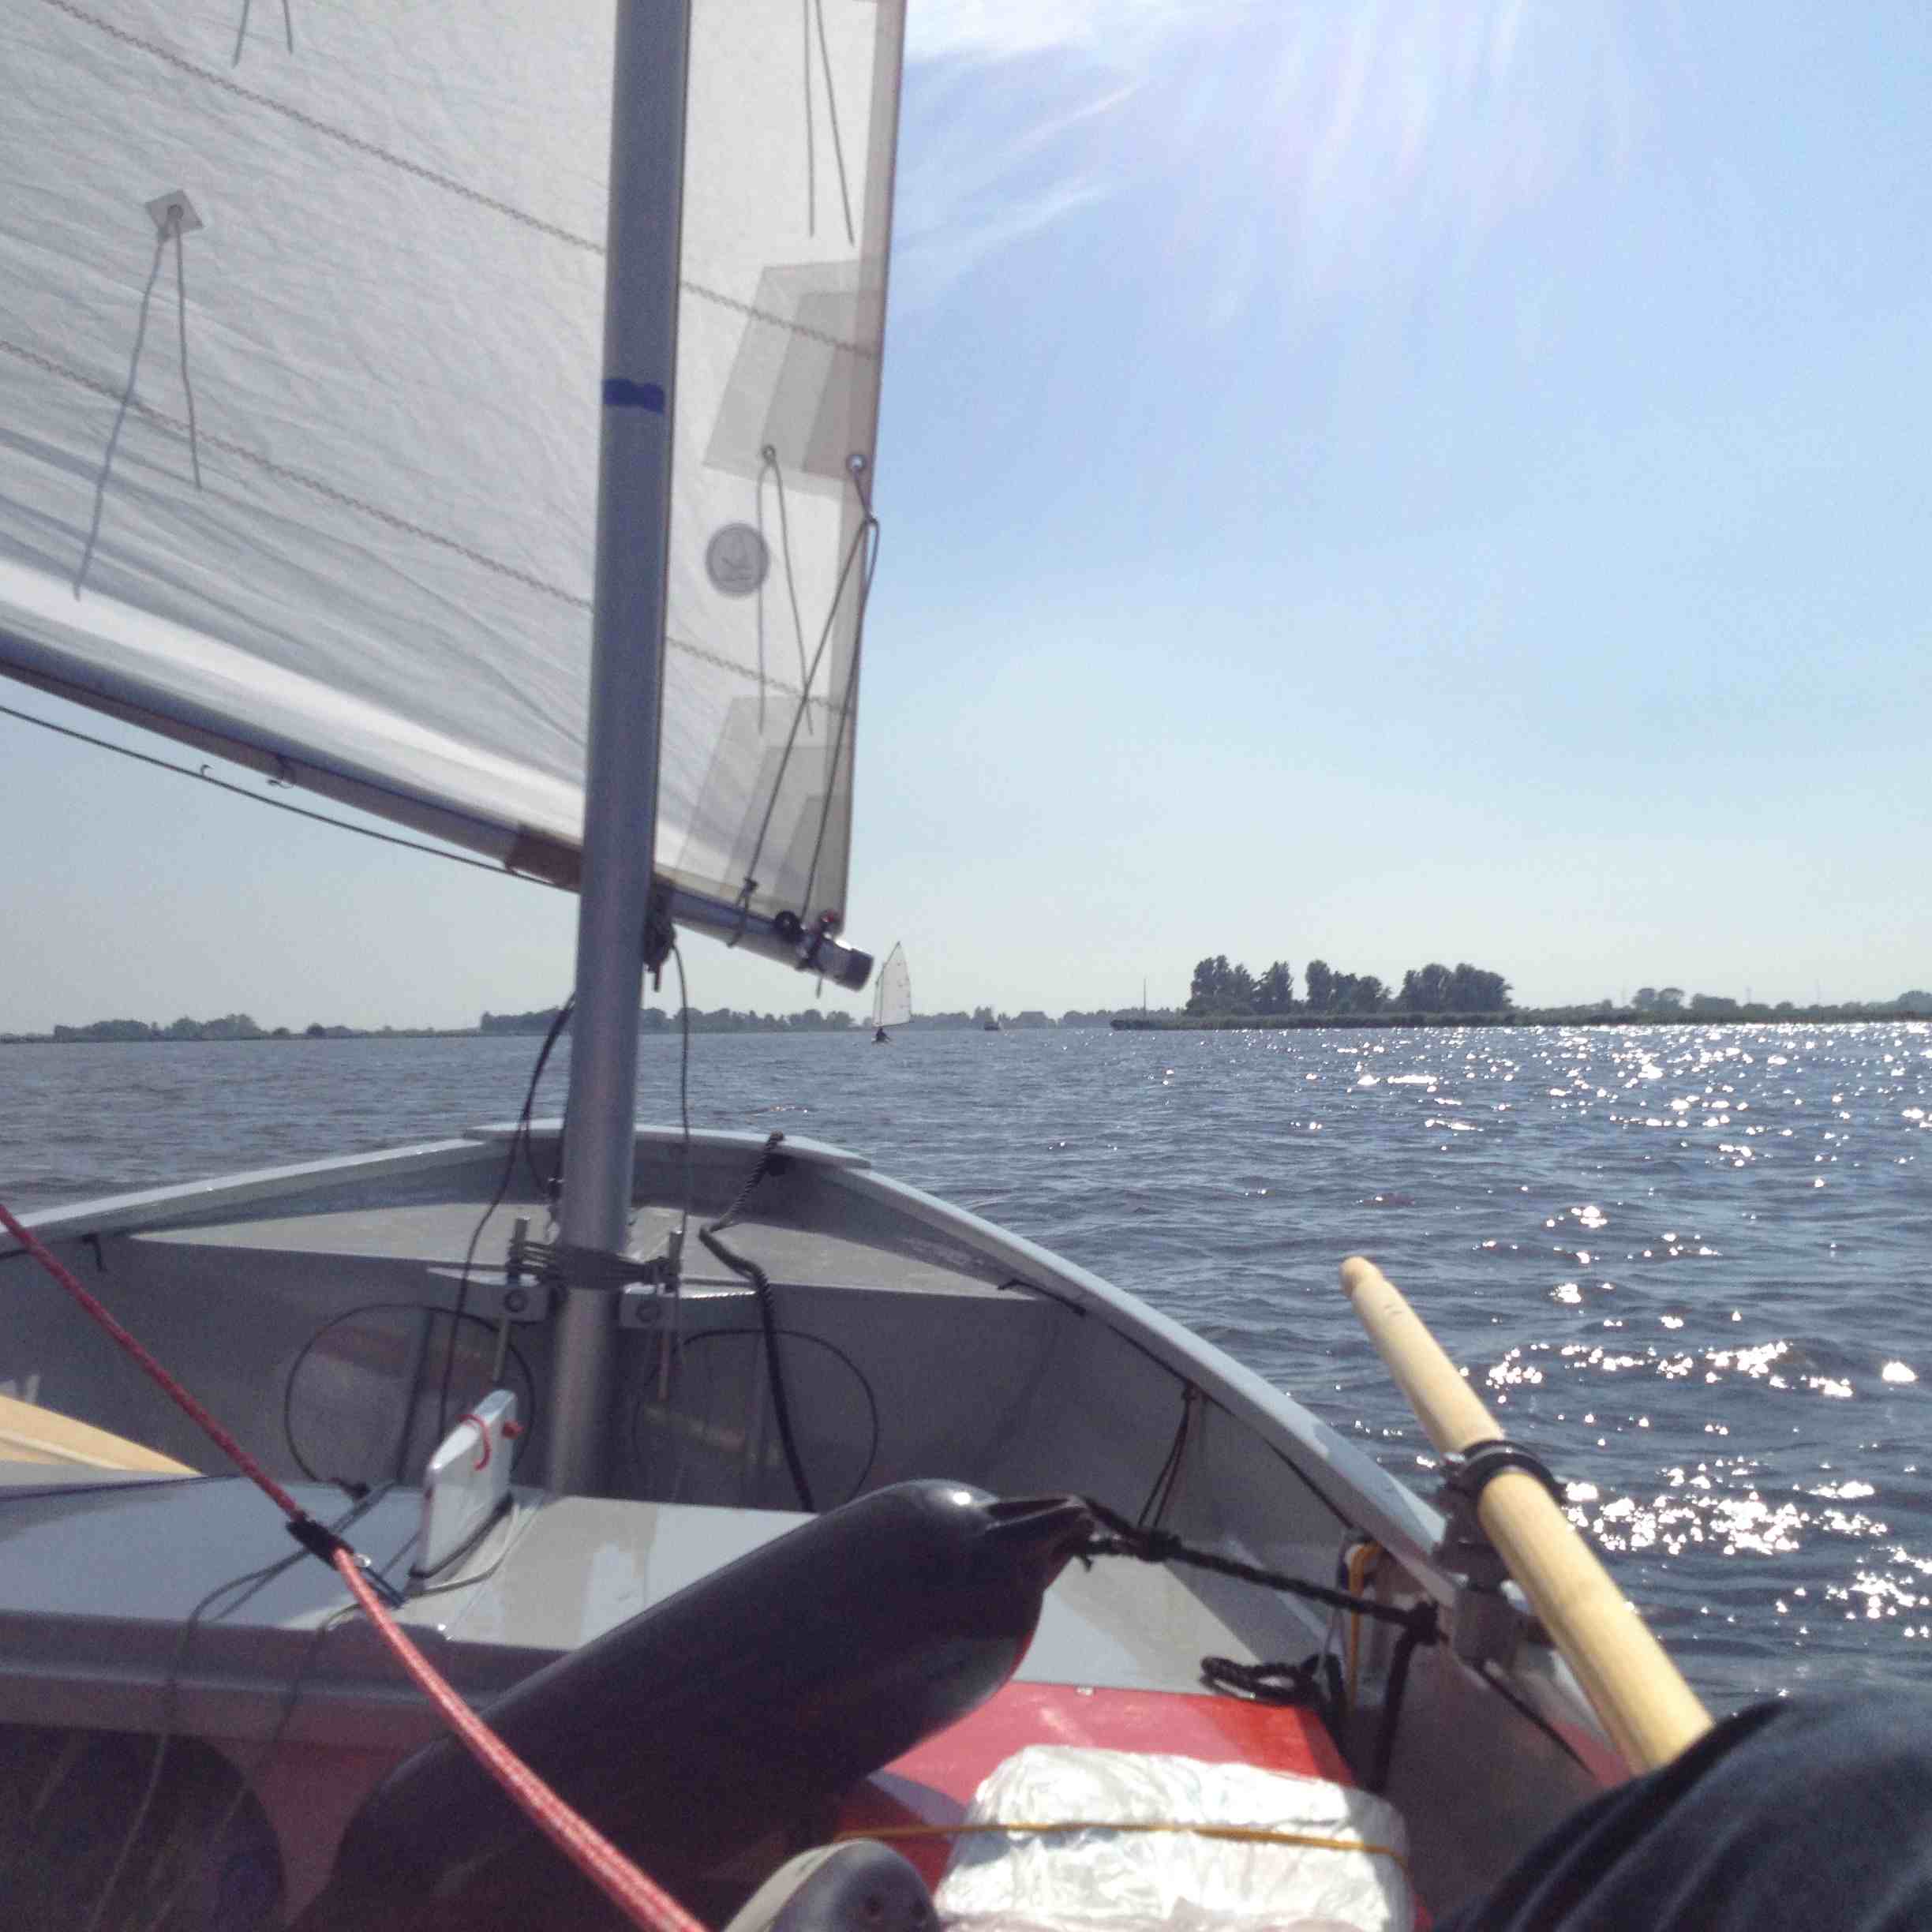
DCA Meeting Lauwersmeer 18-19 OctoberAttendees:
Saturday 18 OctoberBlue skies and a SE3 promised some fine sailing on Saturday. Koos was a bit under the weather and stayed at home. Hubert and Joost arrived around 0930 at Jachthaven Lauwersmeer and met up with early birds Henk and Heike who had sailed over from an island on the Schoenerbult where they had camped on board Magnes. Locals Albert and Rene were on their way from Lauwersgat near Lauwersoog. Marcel launched his beautifully built Acorn Skiff from Omaho beach while Nomdo launched his alloy dinghy from the public trailer slip at nearby Esonstad. It was quite chilly, We agreed to sail to the Booze Wijf for a coffee break and then sail back to the Schoenerbult island to eat our packed lunches. It was glorious sailing in the sunshine without having to reef. Hatseflats was quick with Joost at the helm. New DCA member Marcel enjoyed the best wind of the season on his Acorn Skiff. It was also the first DCA event for Henk and Heike and Nomdo. After the coffee break at the Booze Wijf we sailed back to the Schoenerbult. On the upwind leg Joost showed how to sail lower and faster with the lug rig, which was an eye opener for Hubert. Albert and Rene trailed the fleet for some time and returned to Lauwersgat. The other boats assembled at the Schoenerbult for a late lunch. After lunch we made it back to Oostmahorn. Marcel went to have dinner in nearby Kollum while the rest went to Hubert and Klarie for drinks. We walked over to 'de Lantaarn' in Dokkum (famous for their killer 'kipsate') where we met Bert and Koos (sans boat). As a veteran of all the DCA meetings in the Netherlands, Koos did not want to miss out. We had a great dinner. Sunday 19 OctoberIt was cloudy and chilly but it would be a sin not to make the most of the SE4. Unfortunately, Marcel had caught a cold or the flue and went home to recover. Albert and Rene decided to sail around on the 'Schoolplein' before putting Sassy Lassie into winter storage. Hubert, Joost and Nomdo decided to sail to Zoutkamp. Despite our two reefs it was a quick upwind ride across the Lauwersmeer on Hatseflats. With Joost at the helm and Hubert on the rail Hatseflats kicked up a lot of spray in the waves. Henk and Heike sailed with us for a while and returned to Esonstad. Nomdo left us a little later to look up his friends Onno and Anneke sailing on their yacht 'Zeeroos'. Hatseflats now remained the only boat sailing up the channel to Zoutkamp. Hubert short-tacked along the channel trying to sail low and fast with the lug rig. For older racing sailors it is counter-intuitive to sail low and fast. If you are used to sail with the boom on the centerline, it feels strange if you leave the boom at the gunwale. Pointing towards a fixed object like a buoy or radio mast looks efficient even if we are slipping sideways as we try to pinch to windward. Throwing the old habits overboard took a lot of confidence but after a while Hubert started to get the hang of it. After three hours beating to windward, Hubert and Joost left Hatseflats in the marina at Hunzegat and walked to restaurant ZK86 overlooking the Reitdiep. After a nice hot lunch they hoisted sail on Hatseflats and spent the next 90 minutes blasting back to Esonstad. It was now quite cold but it had been a very nice trip to end the sailing season. 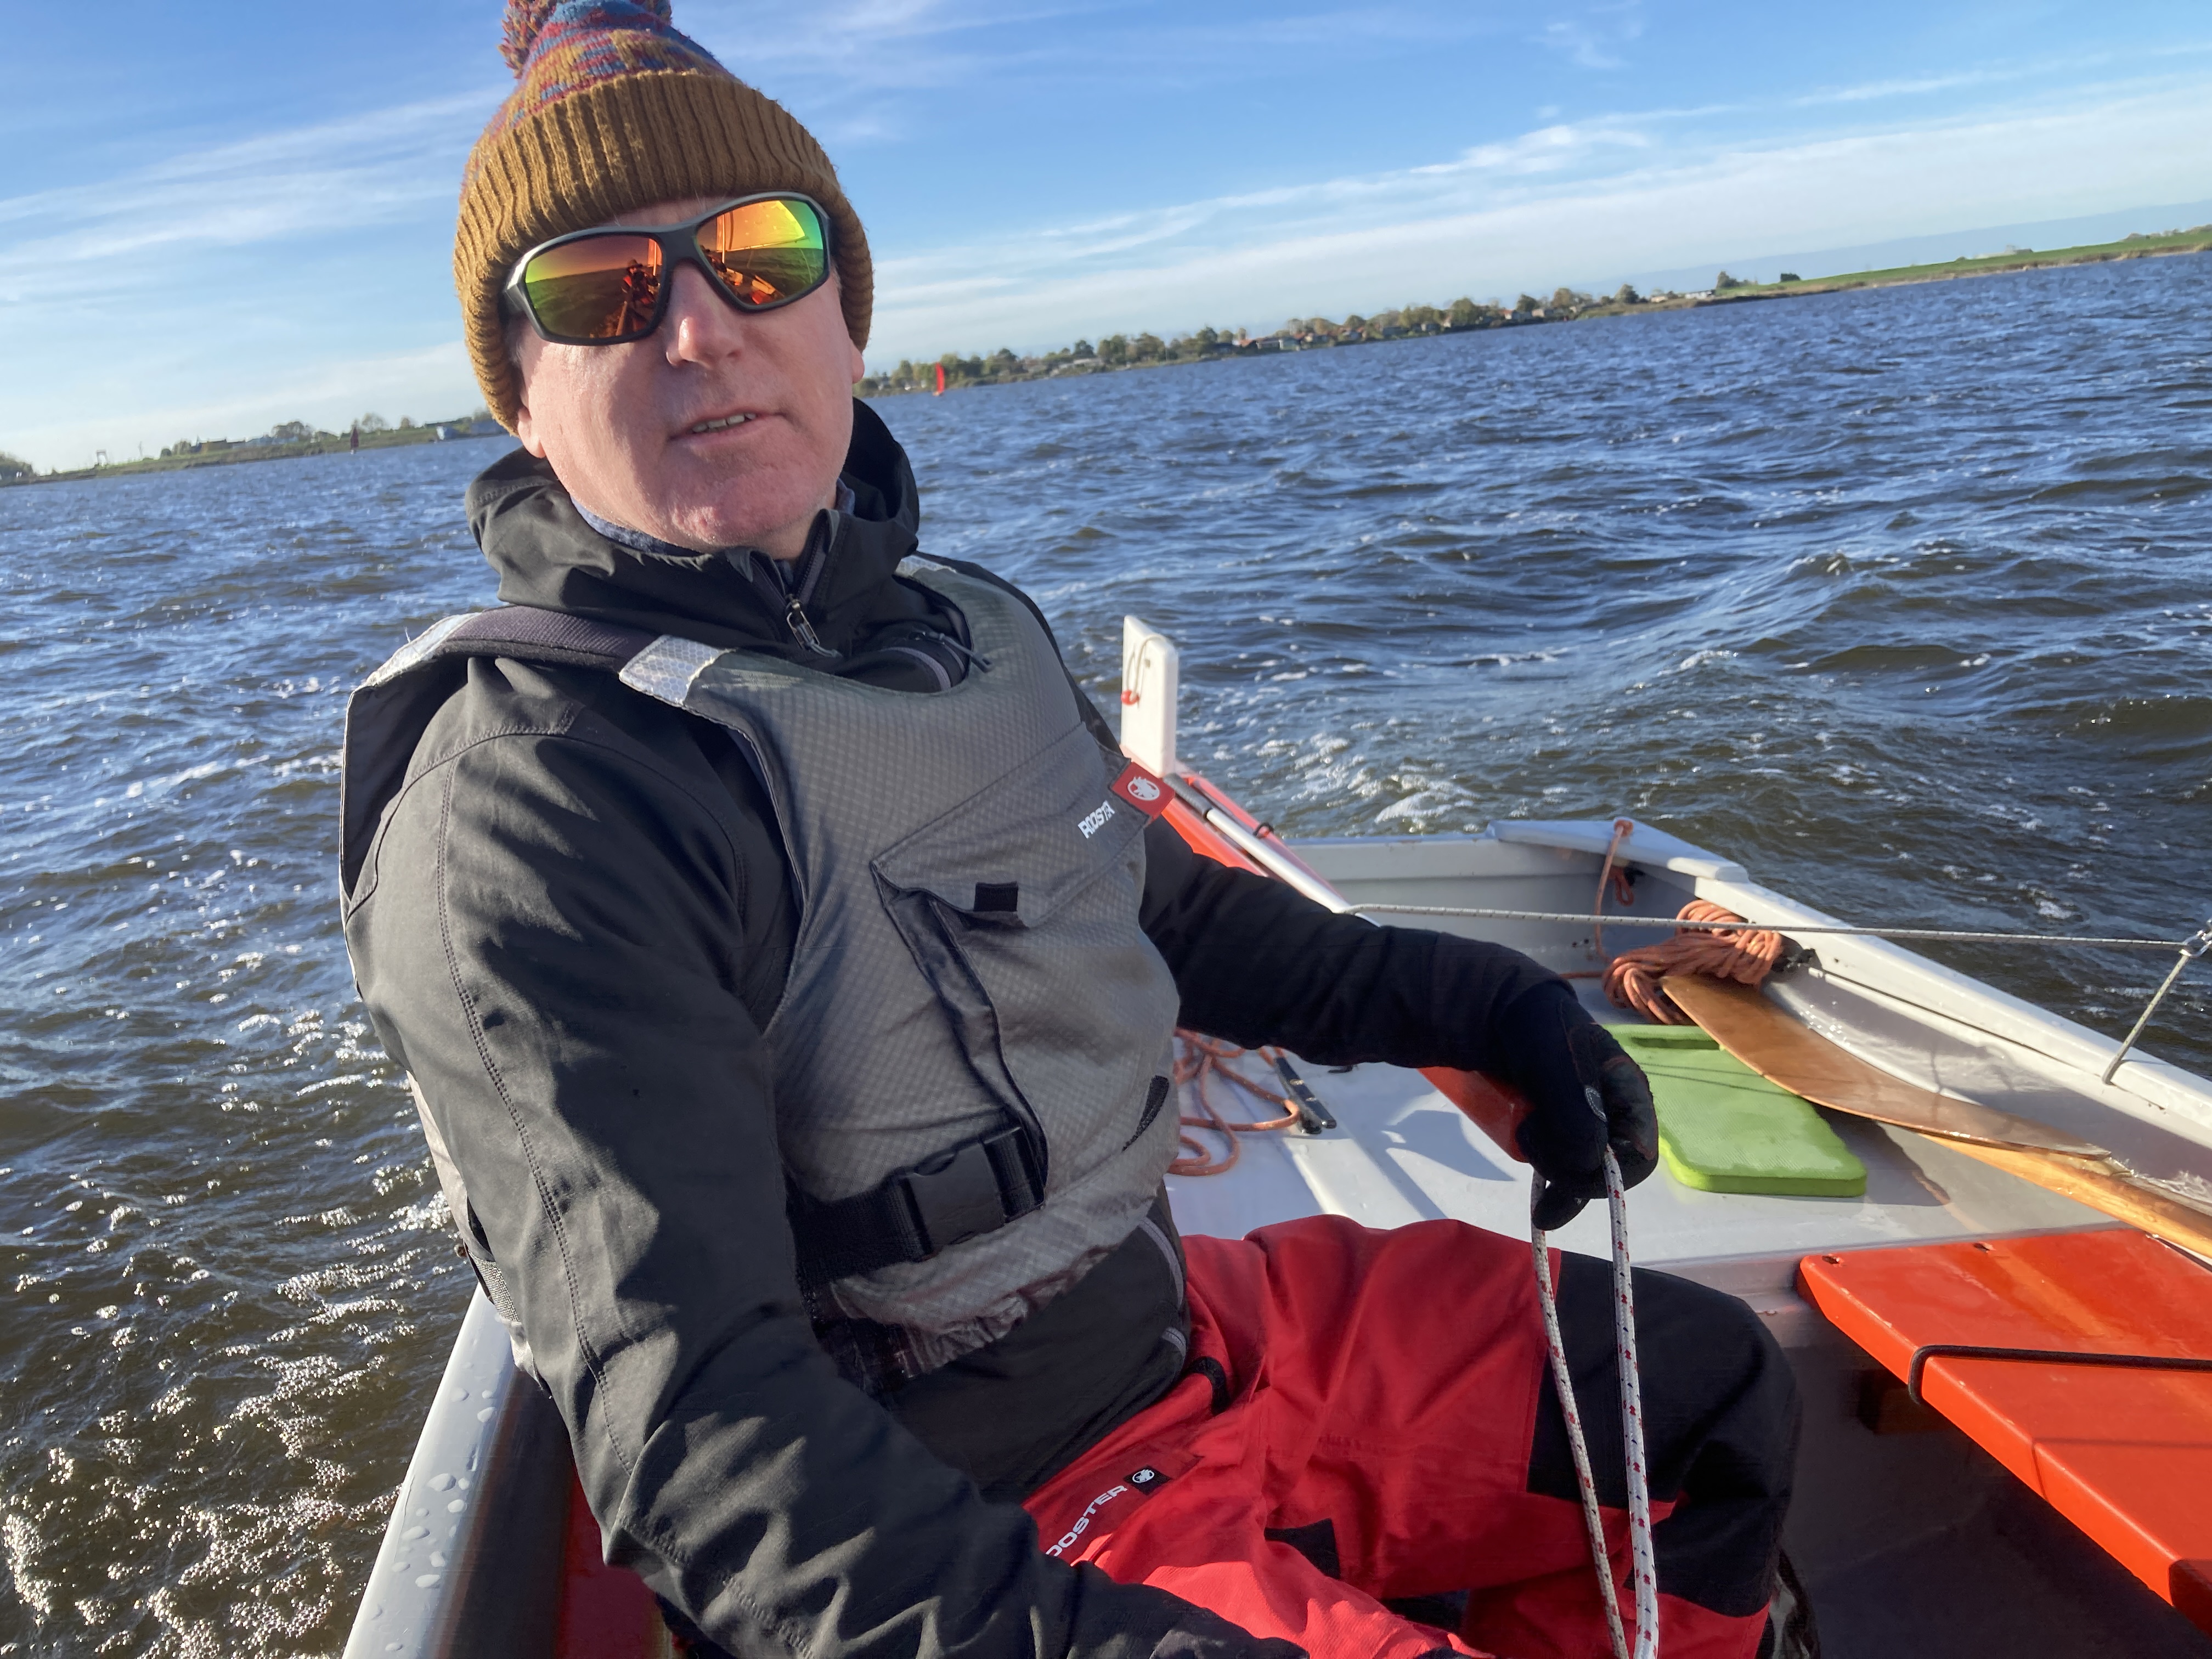 Joost helming Hatseflats. Photo Hubert  Henk and Heike with Magnes. Photo Rene 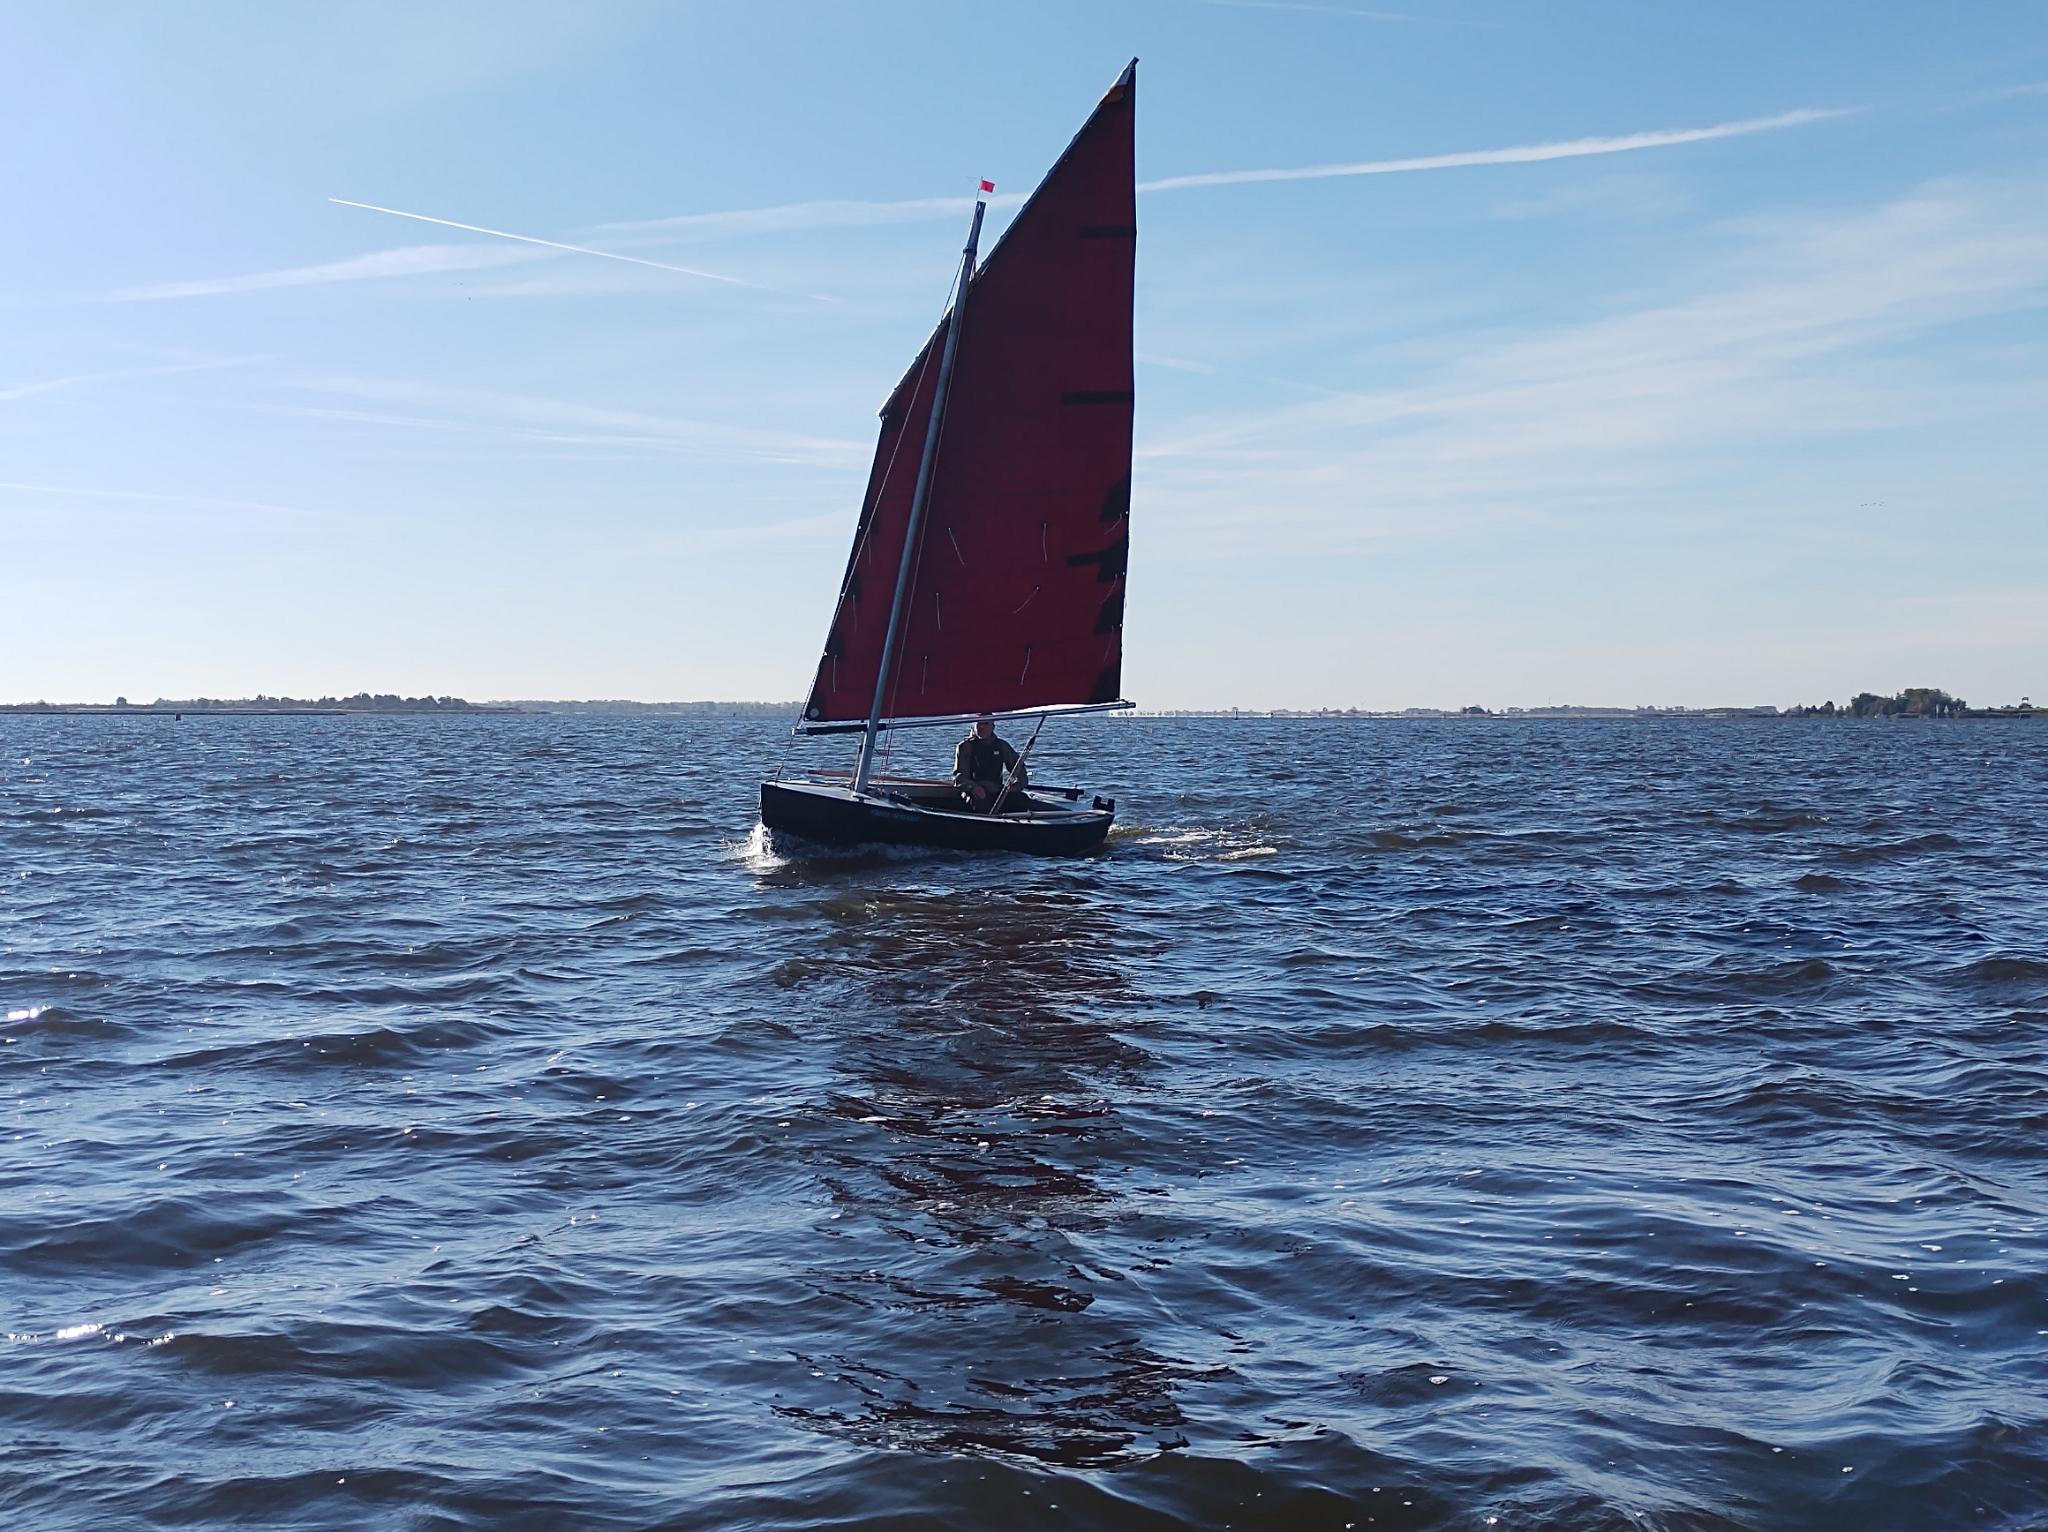 Nomdo and Big Optimist. Photo Rene 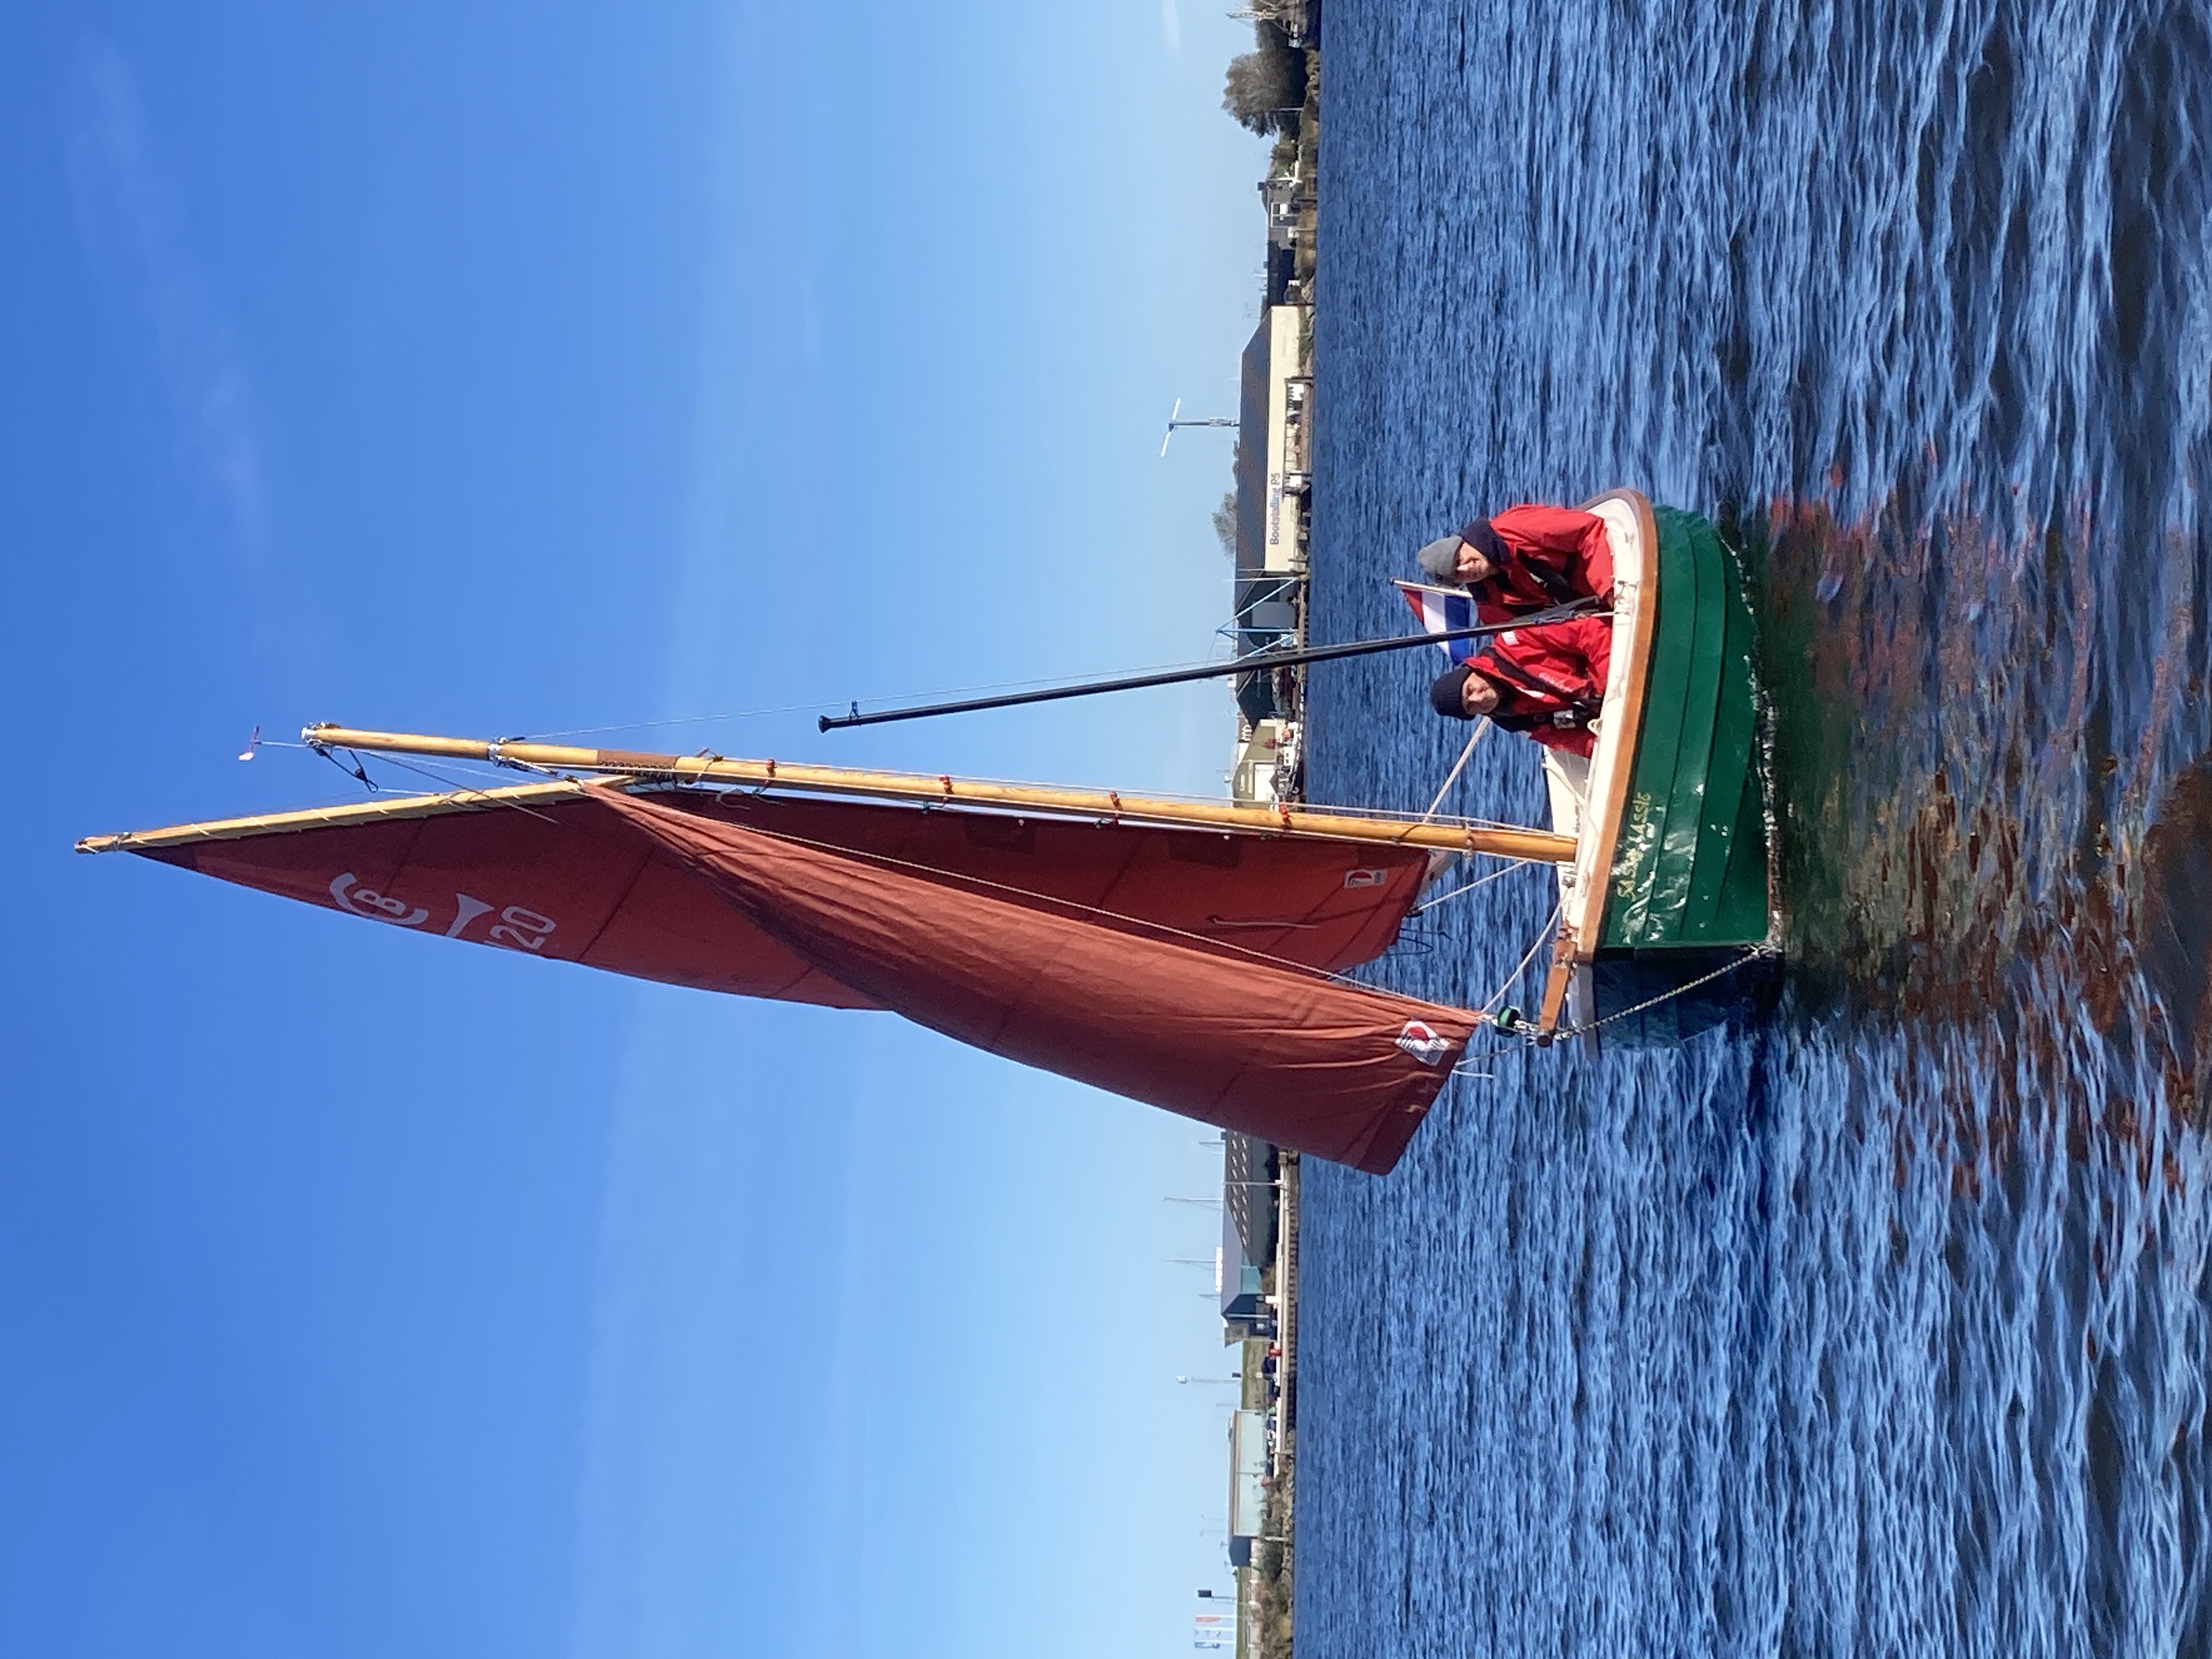 Albert and Rene on Sassy Lassie. Photo Hubert 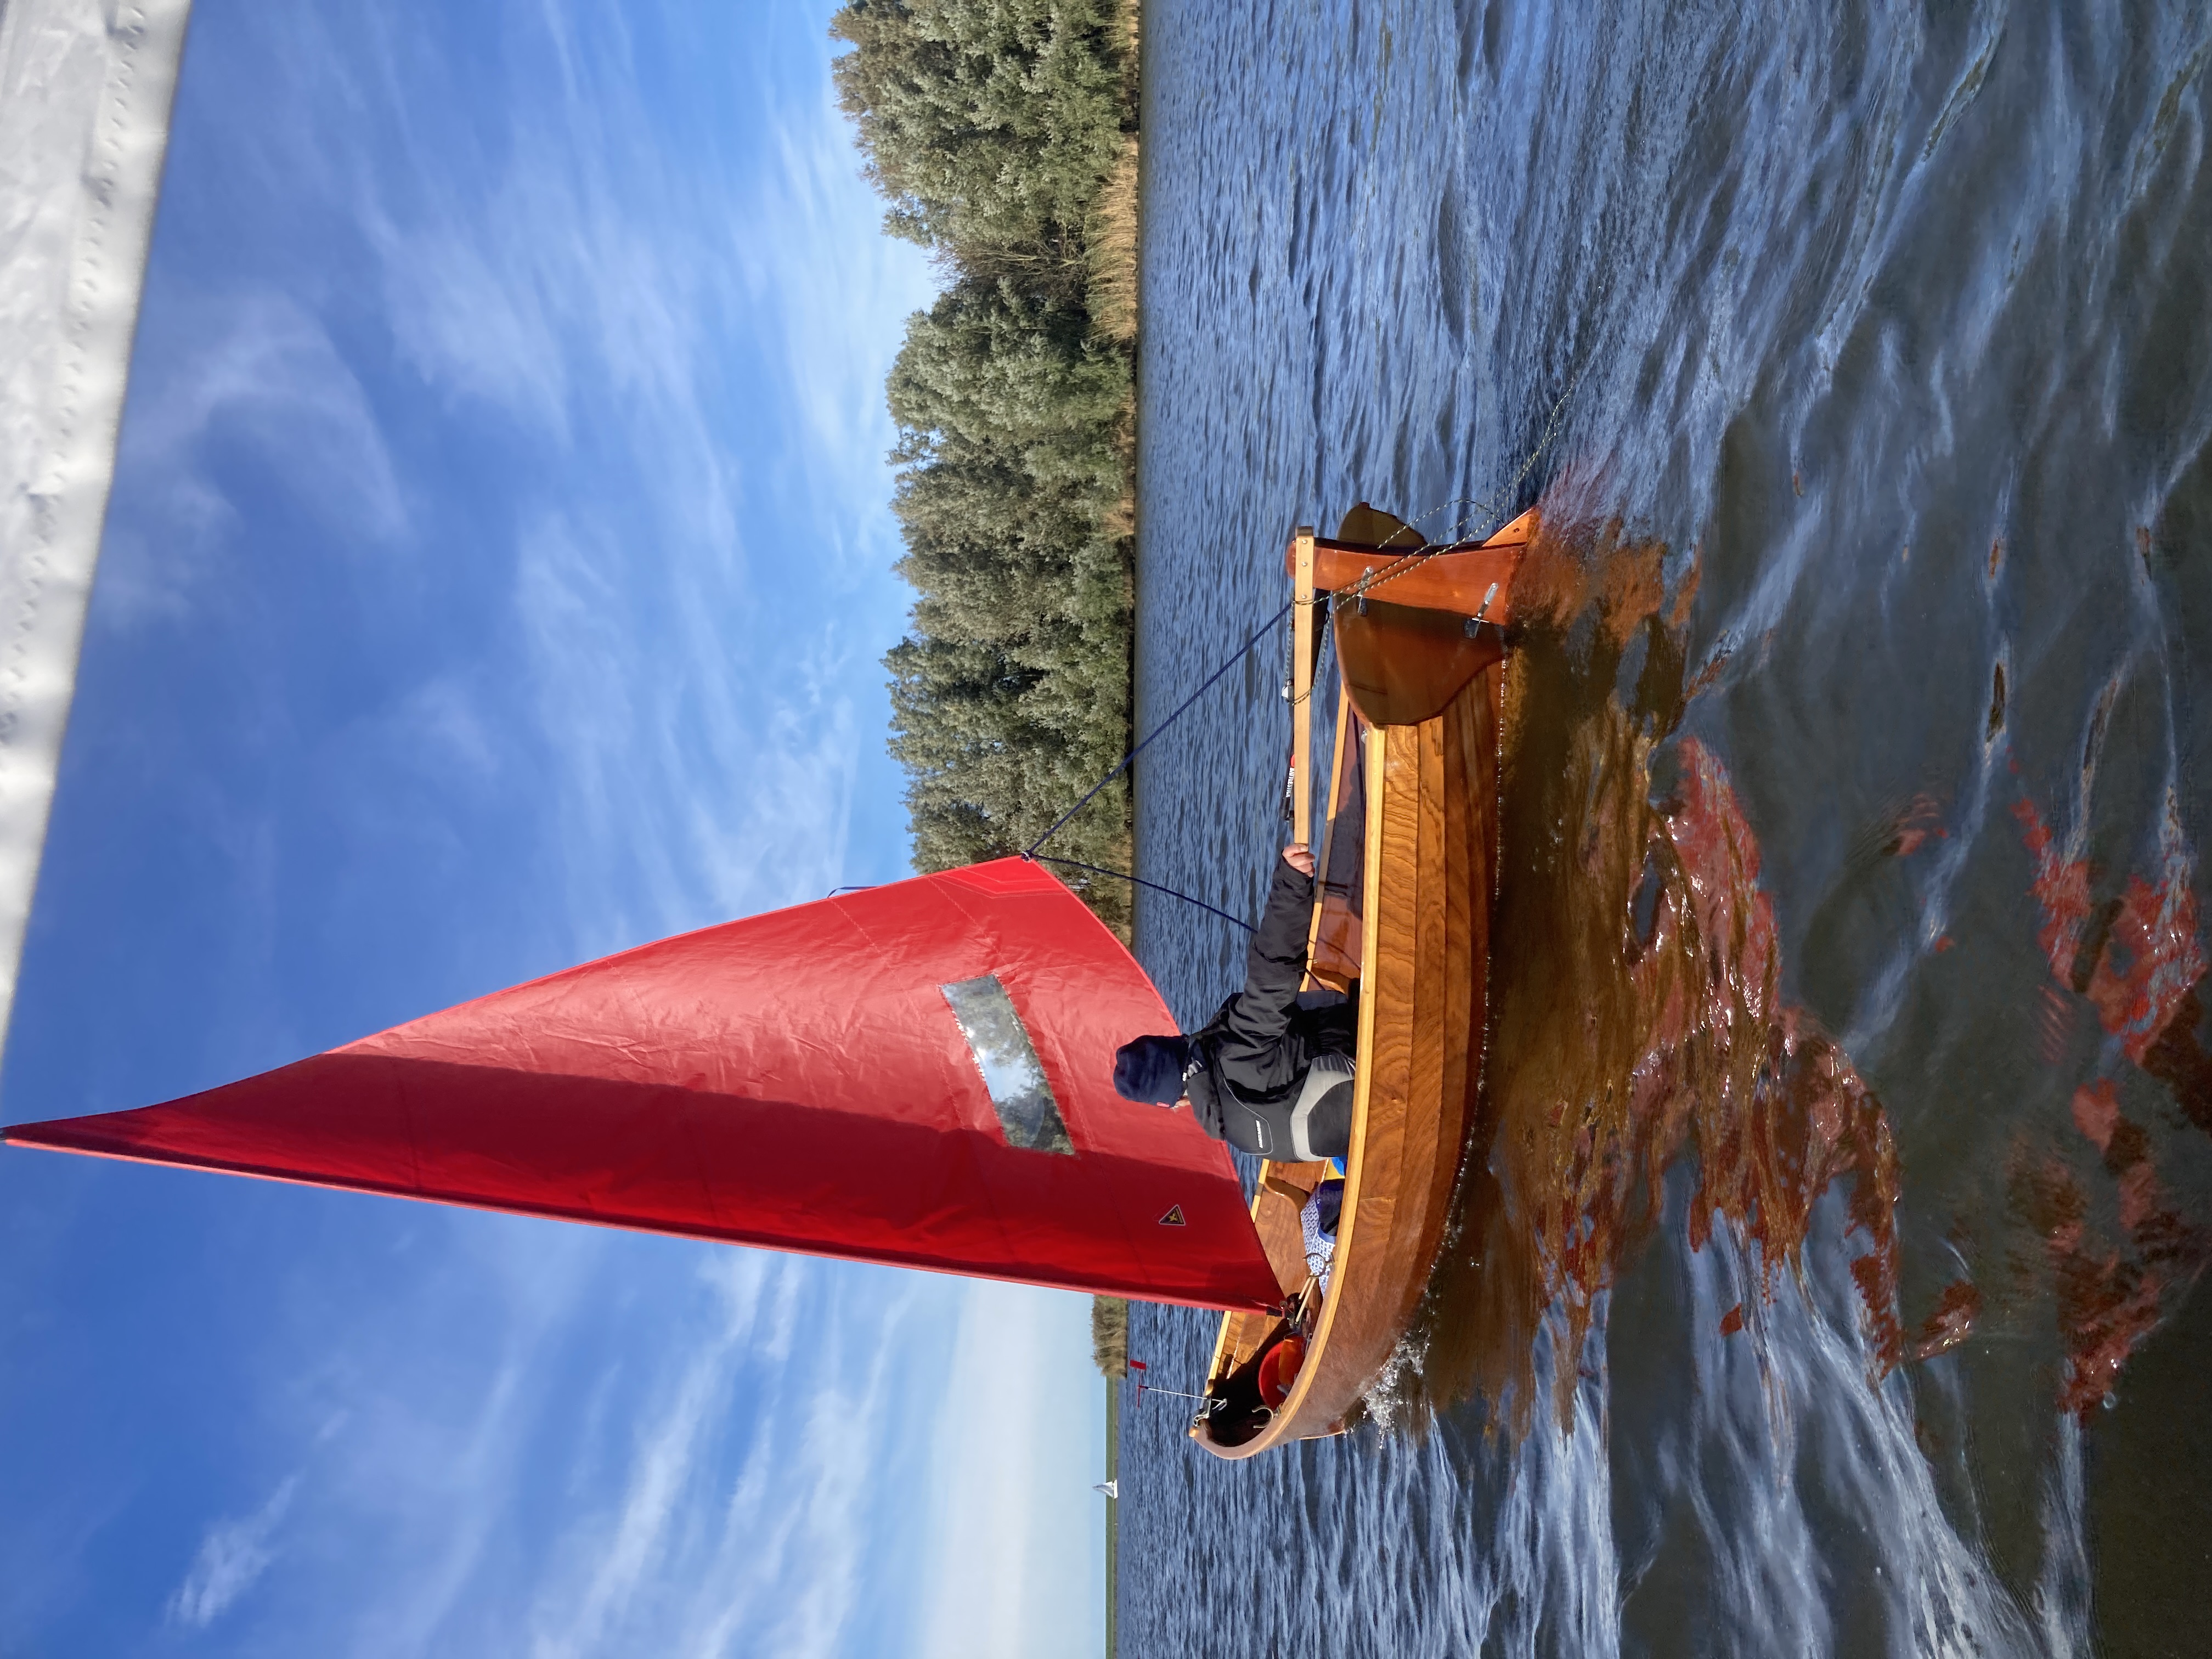 Marcel and Acorn Skiff. Photo Hubert  Marcel and Acorn Skiff. Photo Hubert 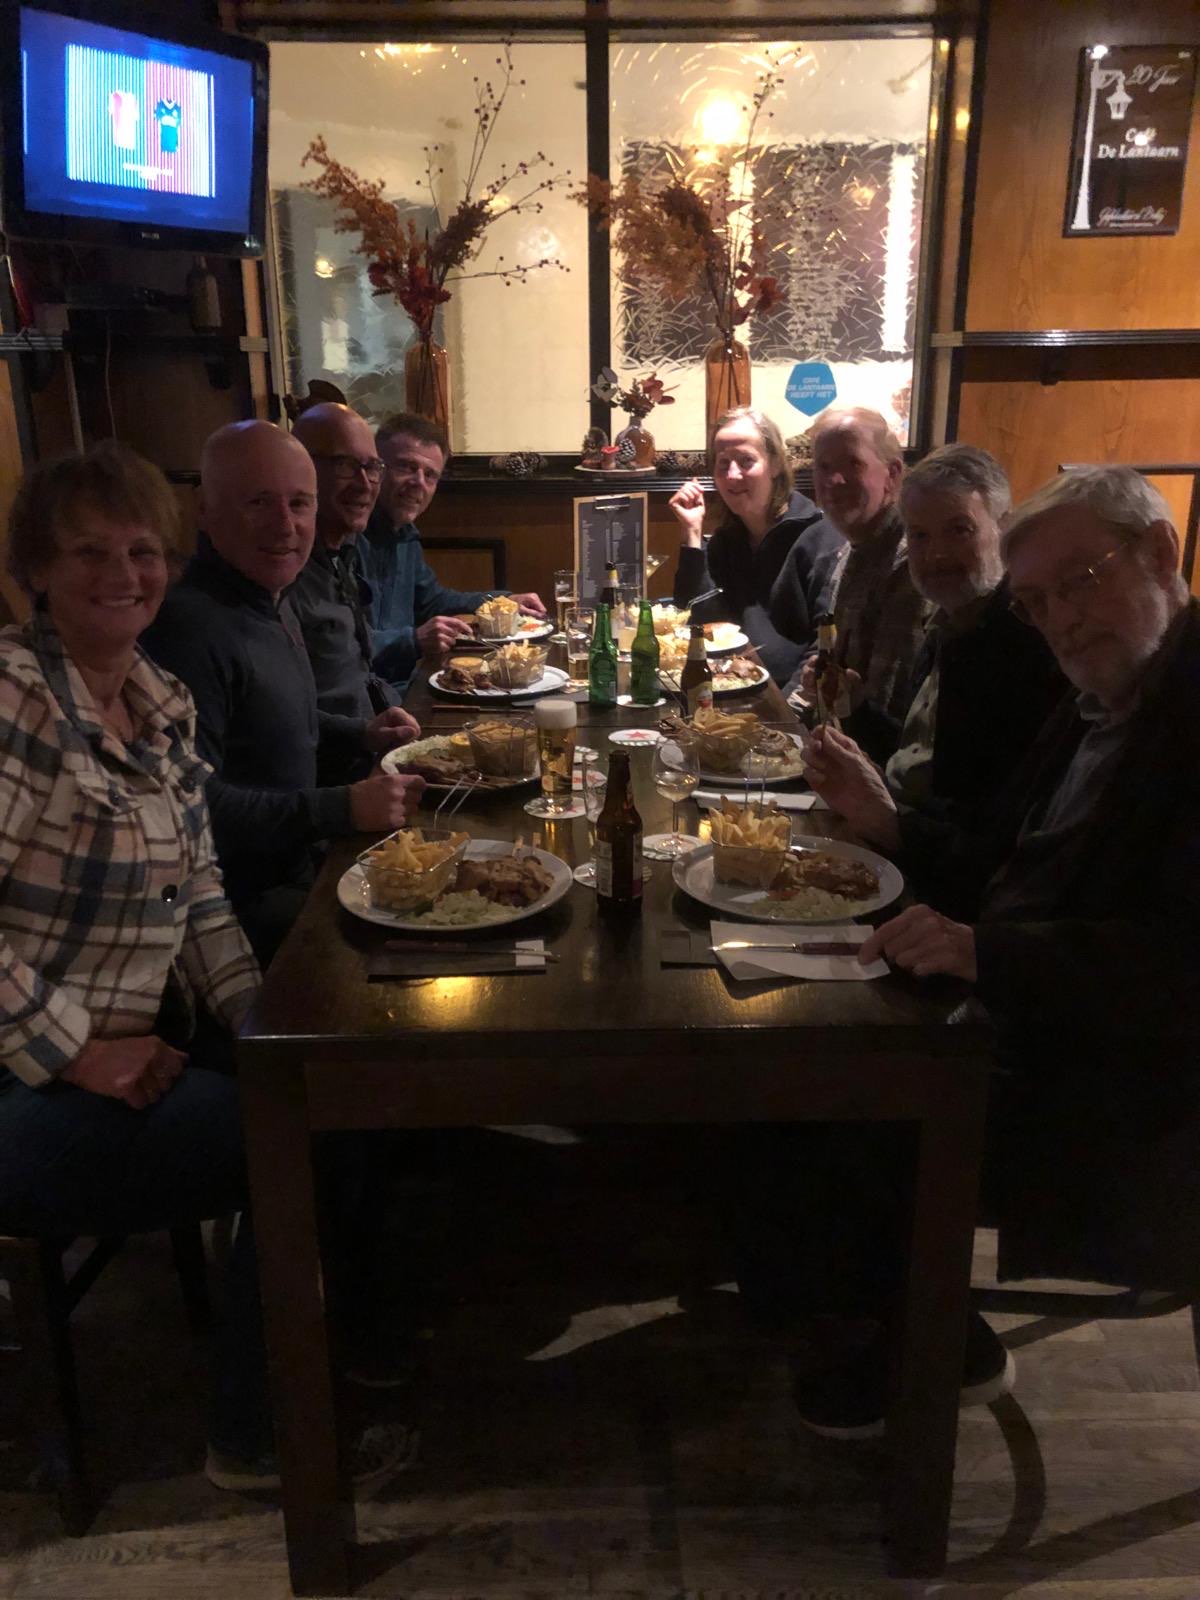 Dinner at the Lantaarn. Photo Klarie |