Dinghy Camping - Lessons learned
Our 2025 Limfjord cruise with Vincent and Inge was the first time that Klarie and I camped
together on Hatseflats for a longer time.
We soon settled into the new regime and enjoyed camping on board.
After a couple of days the weather became unsettled with predictions of more rain for the next days, and
the four of us decided to call it a day and conclude our tour some other time.
This write-up is partly to prepare for our next cruise, but may be useful to others, too.
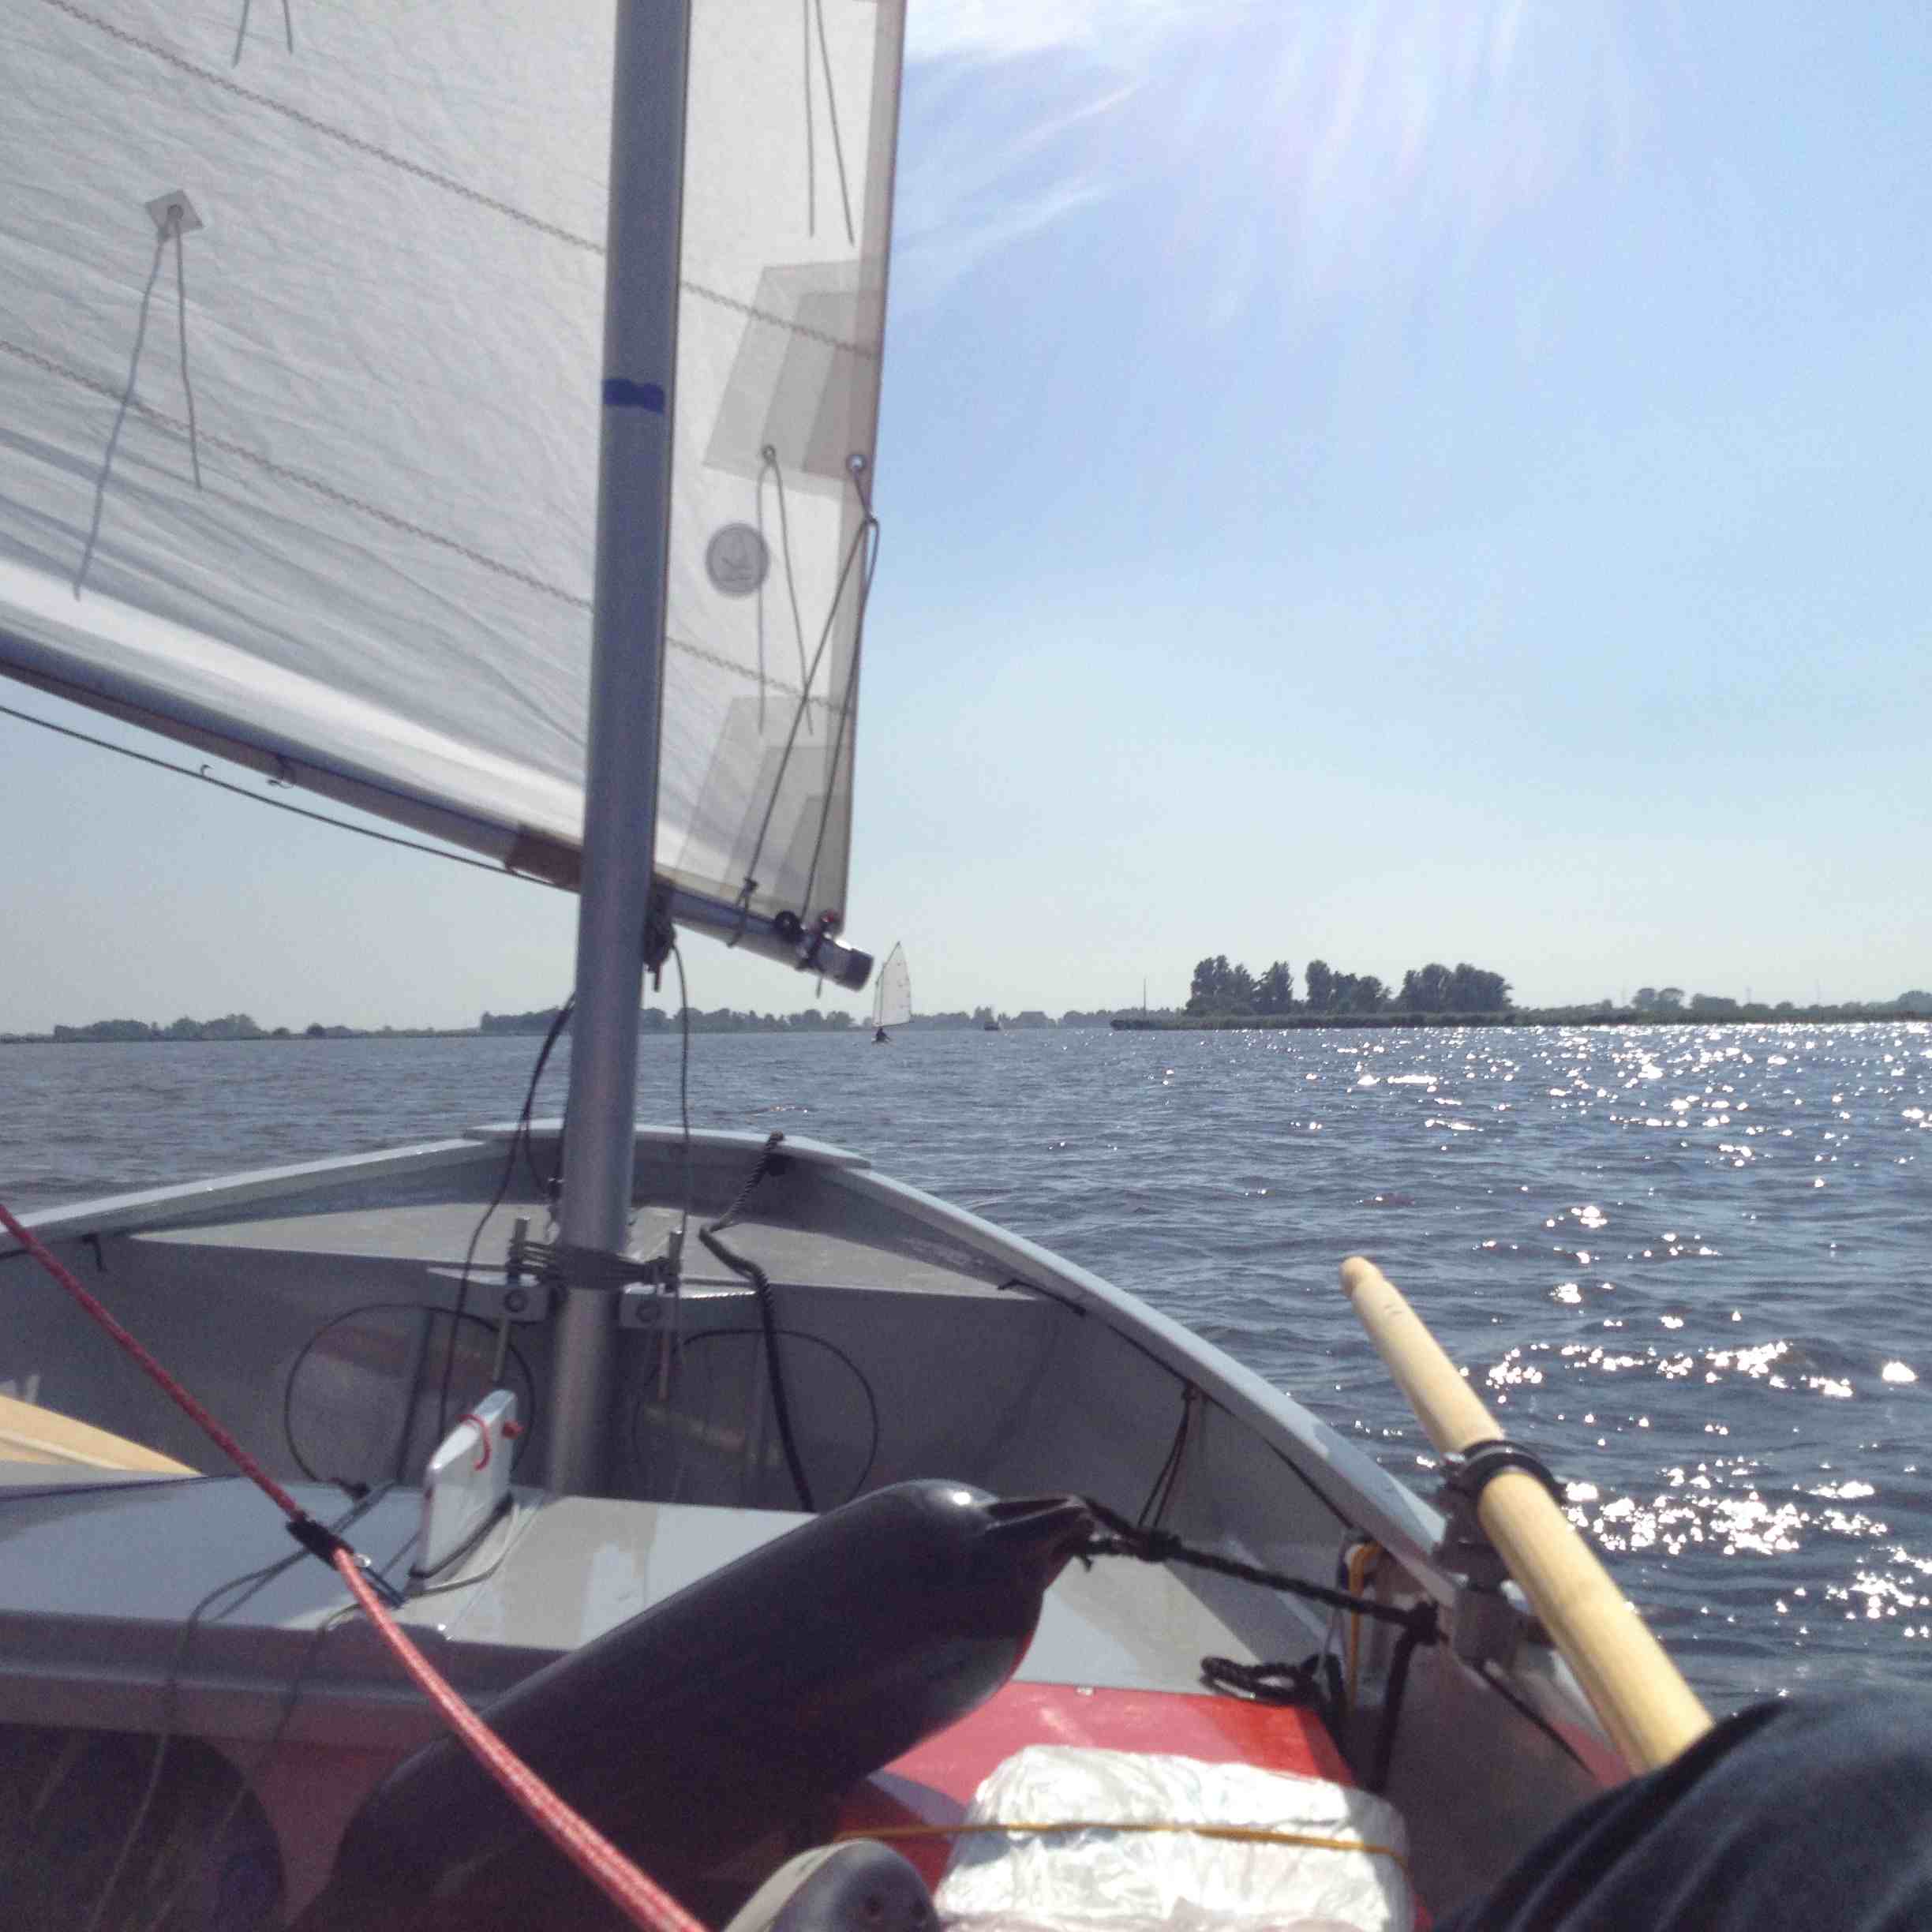
Mooring and anchoring
Once our boat tent is set up, it is easiest to pull the zip up and enter from the sides.
There is another zip at the transom, and if you are moored with the stern towards the dock you should be able
to climb in and out over the transom (after unshipping the big rudder first, of course).
At least, that's the theory.
In practice we always try to find vacant spots alongside a jetty or quay.
We found these points important for mooring:
-
Finding suitable small boat berths in harbour
In Struer and Doverodde we moored alongside a jetty close to the shore.
When entering a harbour we row all the way to the shore to look out for spots for small boats
where we can moor alongside the jetty.
These are often even too shallow for small boats with big outboards,
but we find them perfect for camping on our cruising dinghy.
And not unimportant: they are the shortest route to the toilet building!
-
Keeping away from high quaysides - or not?
During our trip on the Limfjord we got to the harbour of Tissinghuse under heavy clouds.
We could either moor at a low platform outside the harbour or sheltered behind a high quay.
To climb up the high quay we had stand on the gunwales.
Not very comfortable but at least we were safe.
-
Securing the boat with spring lines
When setting the boat tent around the lowered mast I am moving around the boat a lot.
We now always secure Hatseflats with spring lines even before starting on the boat tent.
They also reduce the risk that you end up swimming between the boat and the dock at night.
-
Storing sail and oars
Our boat tent hangs off the lowered mast, which means that the entire boat is under cover.
Even then it is not a big space.
Headroom is limited to reduce windage and our sleeping platform is just wide enough for the two of us.
The oars and sailbag (with boom and yard) are too big to fit on the sleeping platform as well.
So we leave them on the dock outside.
-
Choosing the right fenders.
In 2021 I bought four small balloon fenders for mooring alongside another dinghy or a quay.
In order to cope with floating jetties or wooden posts we replaced two of our balloon fenders
with regular fenders which we tie from the quay, bollard, post or support.
This way we could always moor Hatseflats securely.
During our Limfjord cruise we did not anchor even once, so our 10kg fisherman anchor was largely a safety device.
I had even brought a folding grapnel anchor to Denmark but wisely left it in the car at Struer.
During the 2024 Baltic Sea Challenge I anchored offshore on the Jasmunder Bodden
and had a rough night until the waves and wind settled down.
Should we have to anchor overnight,
I imagine that I should tie the sail bag and oars to the boom before setting up the boat tent.
I intend to try this out sometime.
Keeping your gear dry
If you are going for a longer cruise it is vital to keep your gear dry even if you capsize.
During my first trip in 2018 I loaded Hatseflats with lots of gear in rack-packs.
Over time the packages got smaller and the rack-packs were replaced with roll-top dry bags.
Our current approach is to use compression dry bags with windows for clothes and sleeping bags
complemented with small roll-top dry bags which are easily stowed under the fore and aft deck.
Here are my experiences with the various types of dry bags.
-
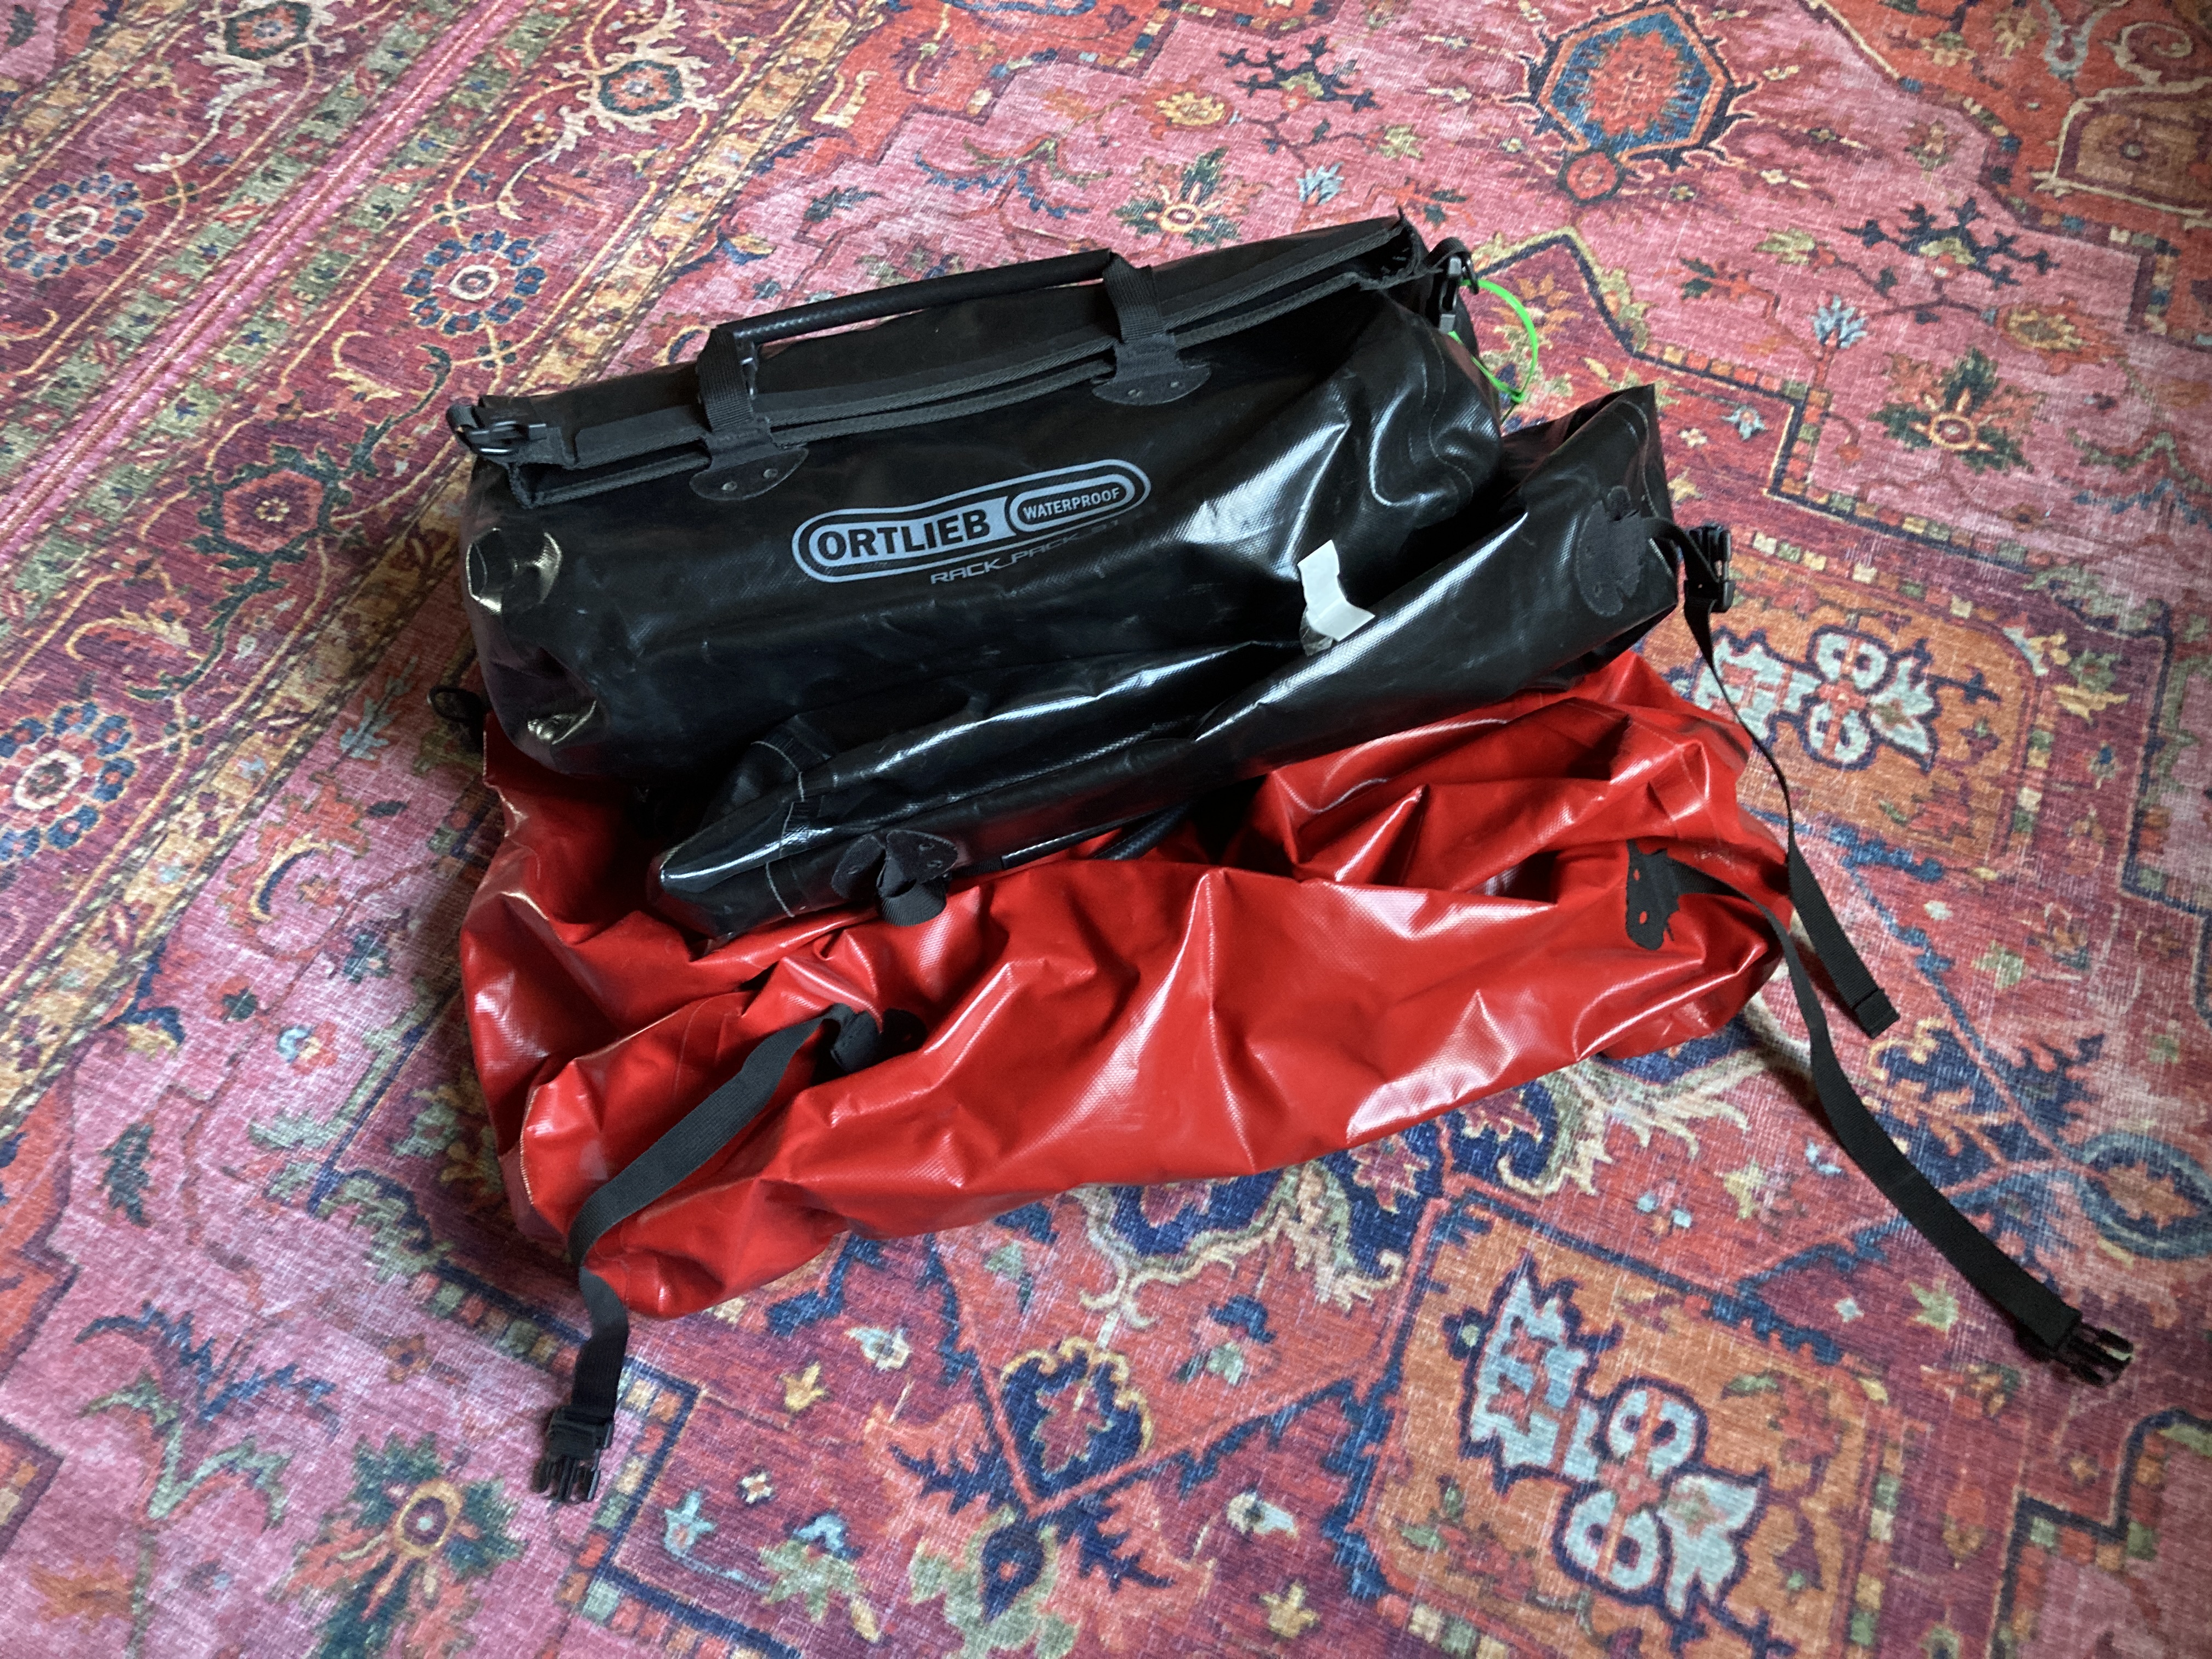
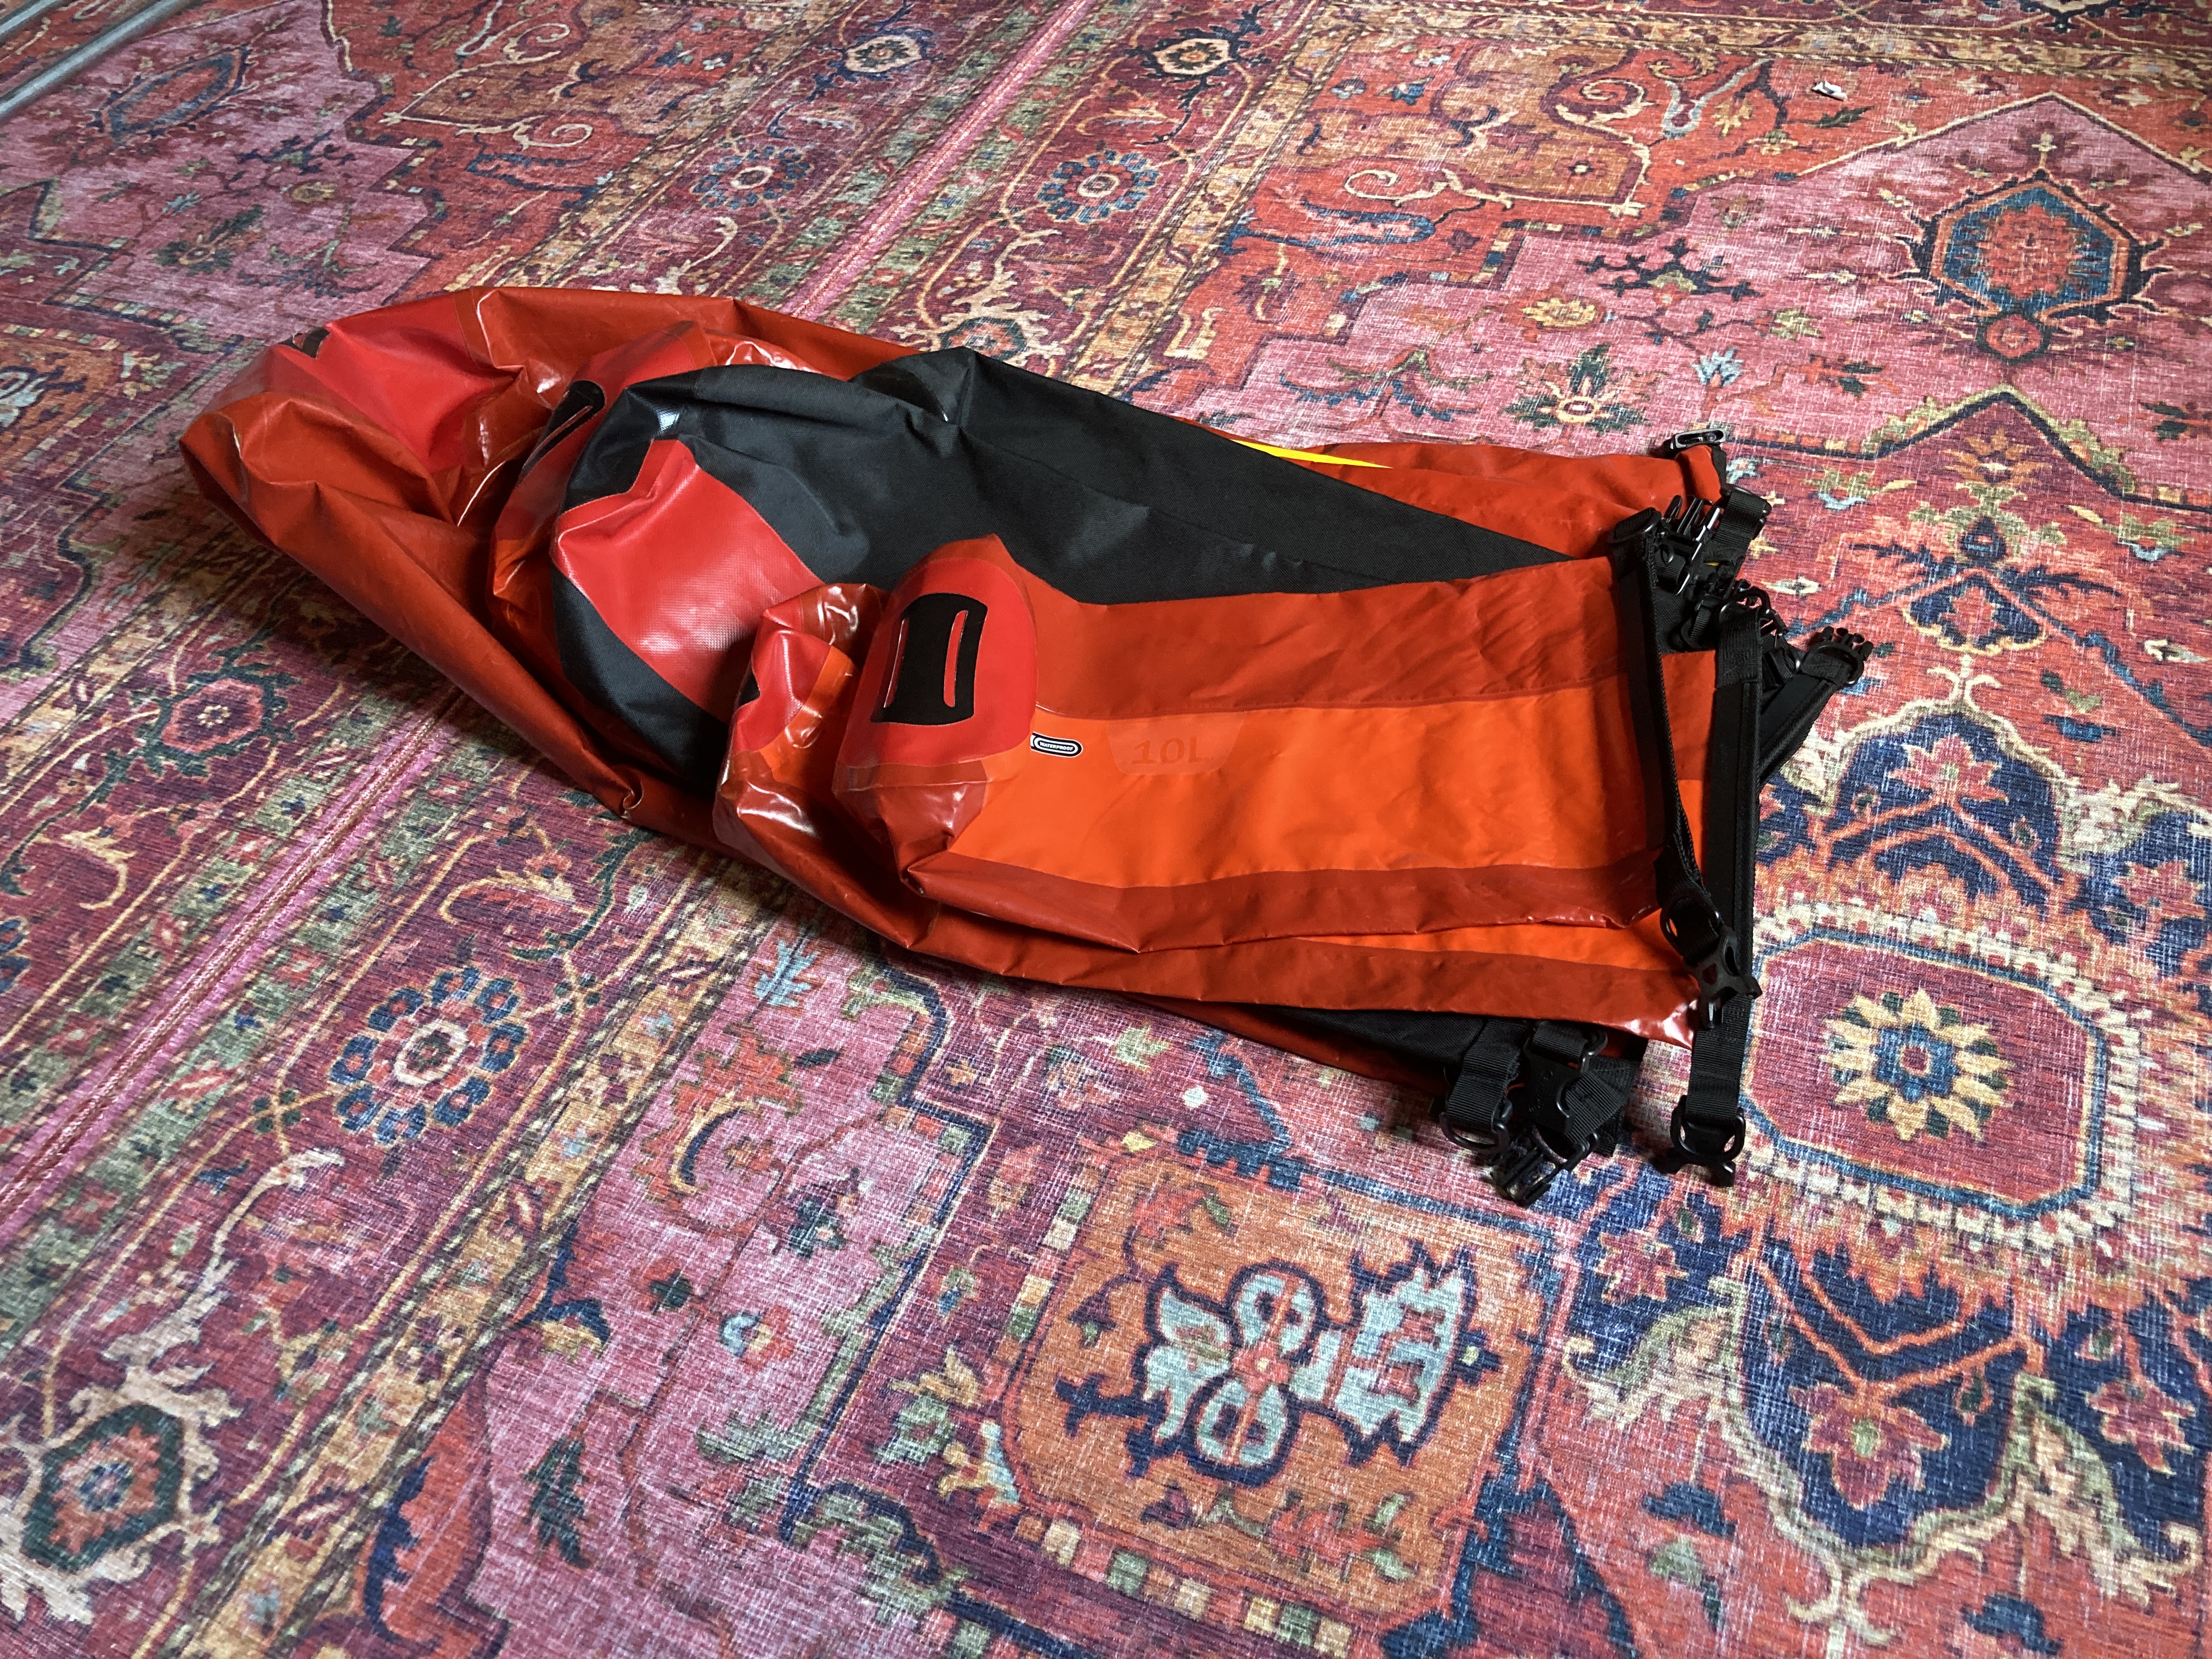
Rack-packs
My first dry bags were 31L Ortlieb Rack-packs.
These are sturdy and waterproof versions of the holdall bag that you would take to the gym.
Open the rack-pack and you see all its contents at a glance.
For a year we carried a 90L rack-pack under the starboard seat which held our Exped 10LXW mattresses.
The problem with the smaller rack-packs is that they have limited volume and are too bulky
to pass easily through a hatch opening.
So we decided to downsize by using smaller mattresses and replacing the 31L rack-packs with small roll-tops.
-
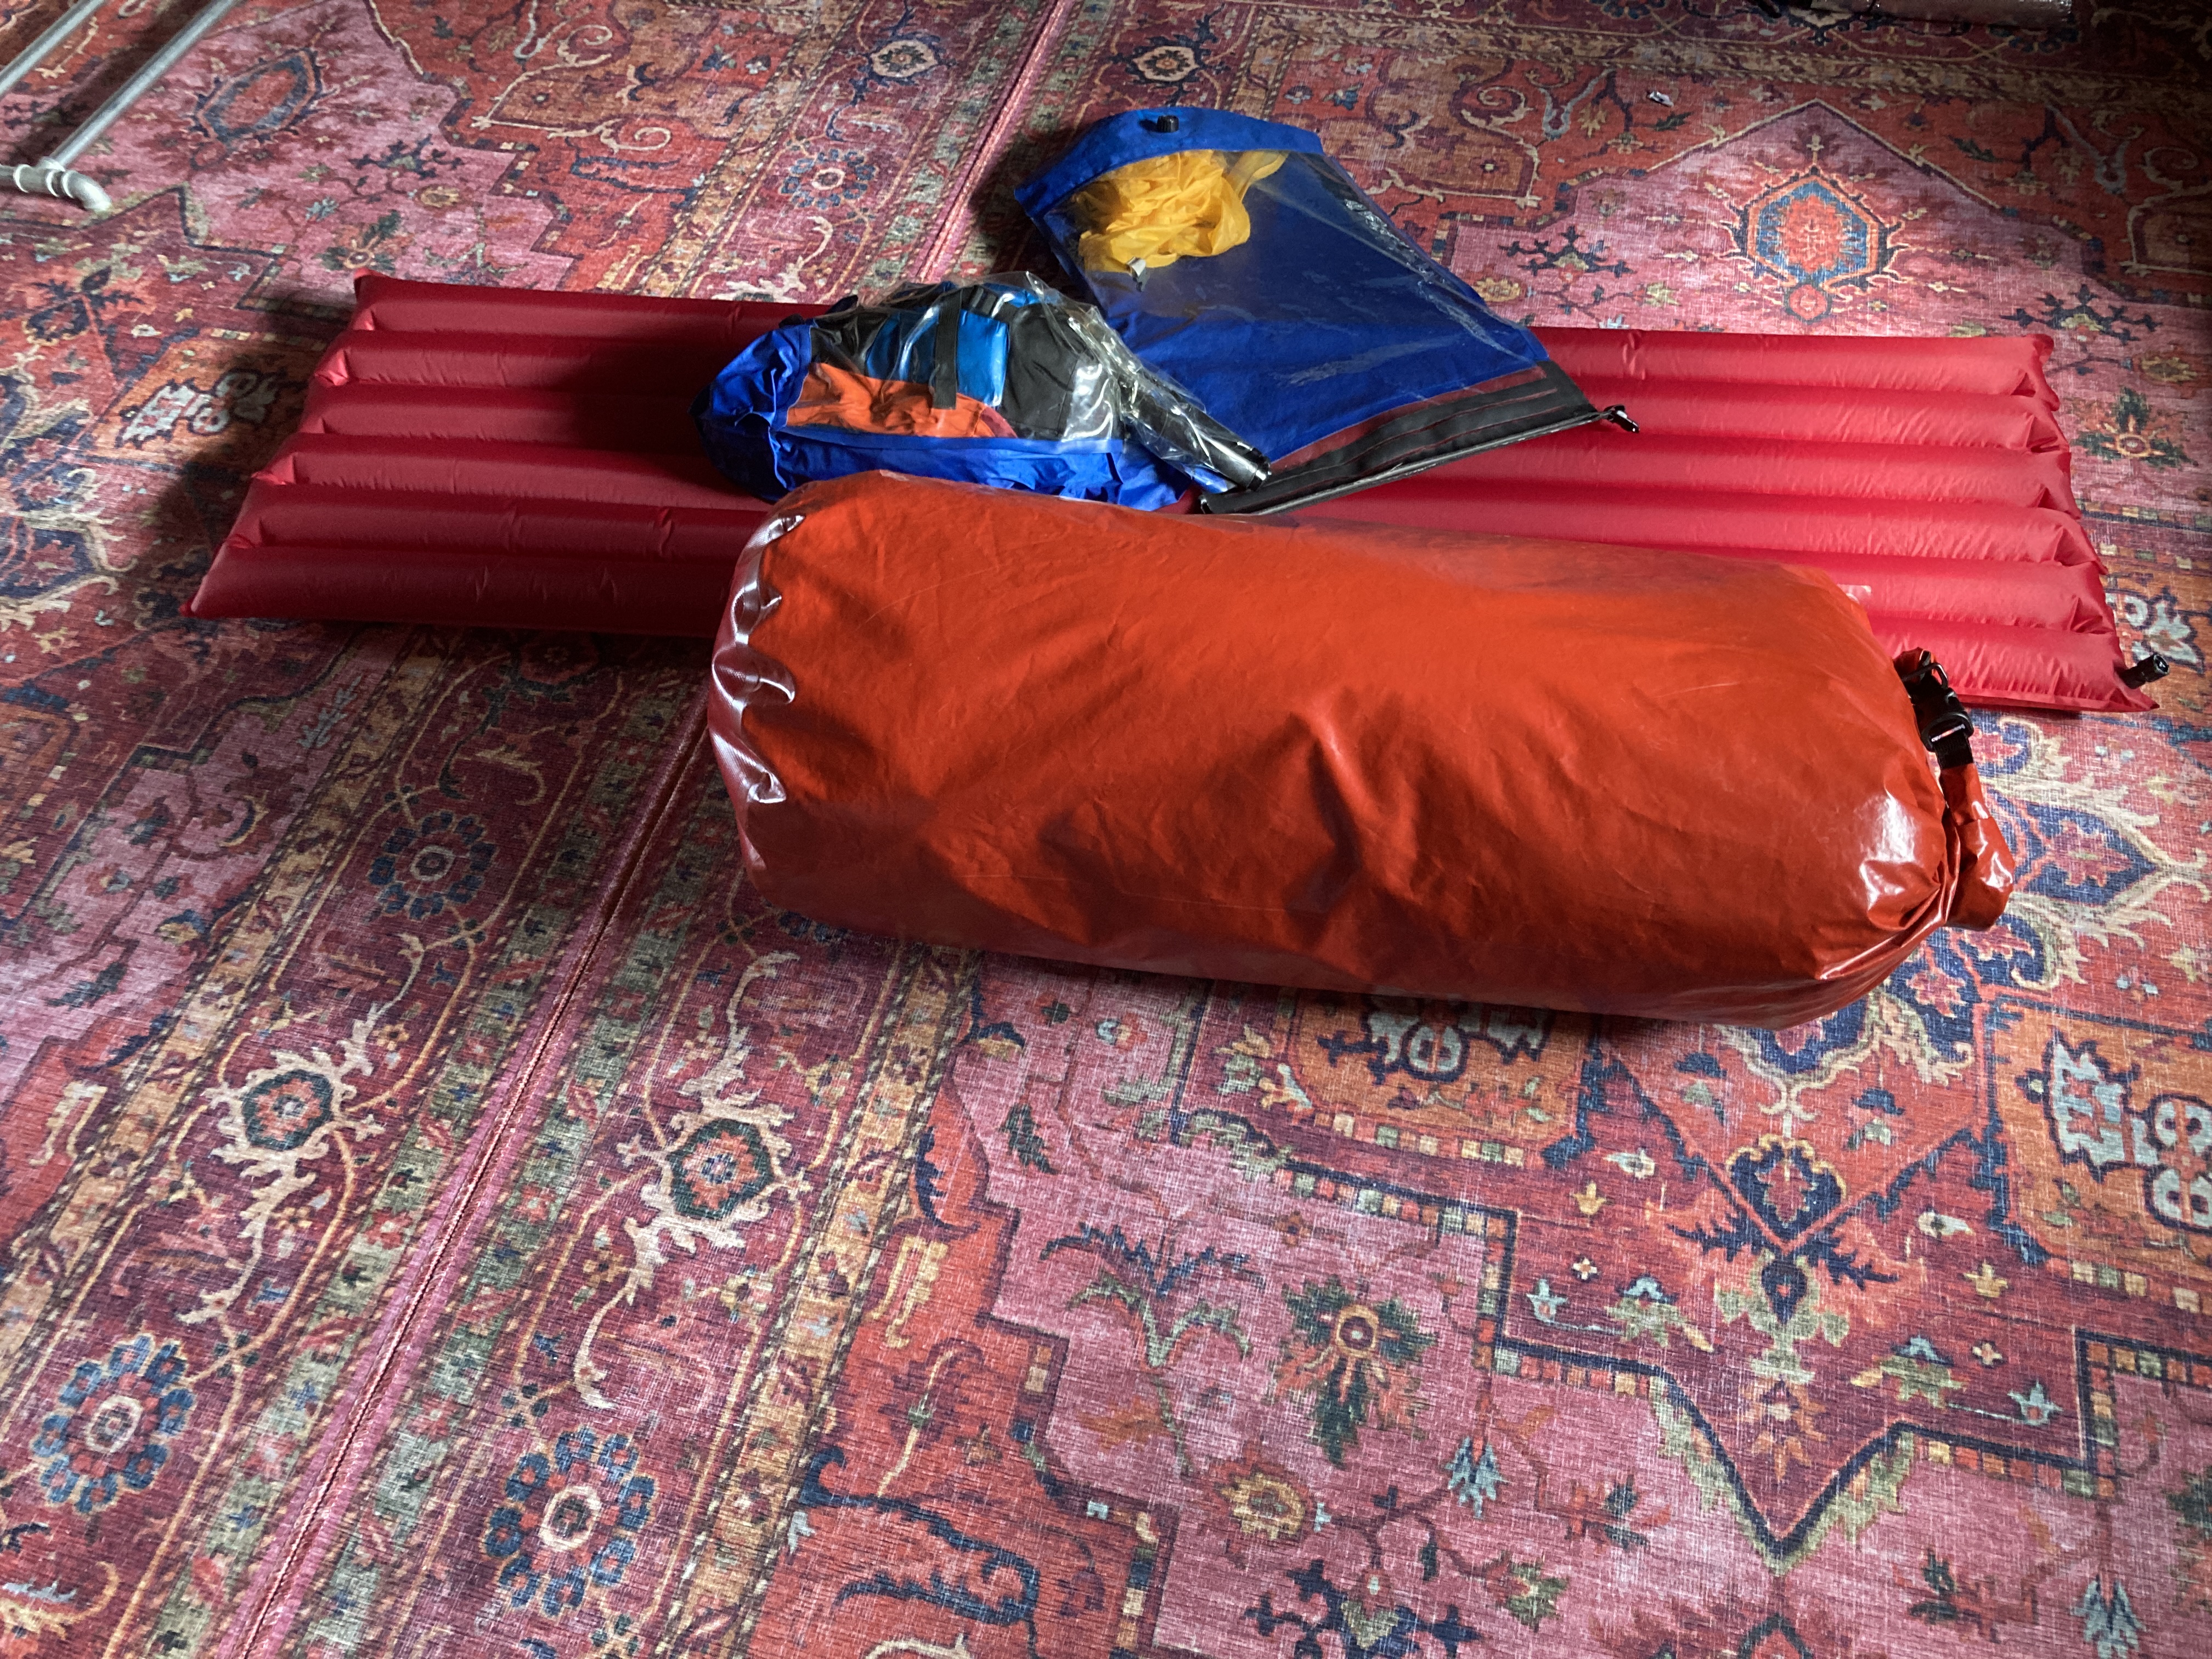
Roll-tops
Early on I bought lightweight roll-top bags which didn't last very long.
So for roll-tops I am only buying the sturdy Ortlieb PD350 roll-tops.
These come in a variety of sizes: 35L, 22l, 17L, 13L and 10L.
The bigger ones have big openings and don't fit easily through a small hatch.
We found the 13L and 10L bags big enough to hold our spare clothes, spare tent etc.
The downside of roll-tops is that the items you want are always at the bottom.
So you have to throw the contents out before you finally find what you were looking for.
-
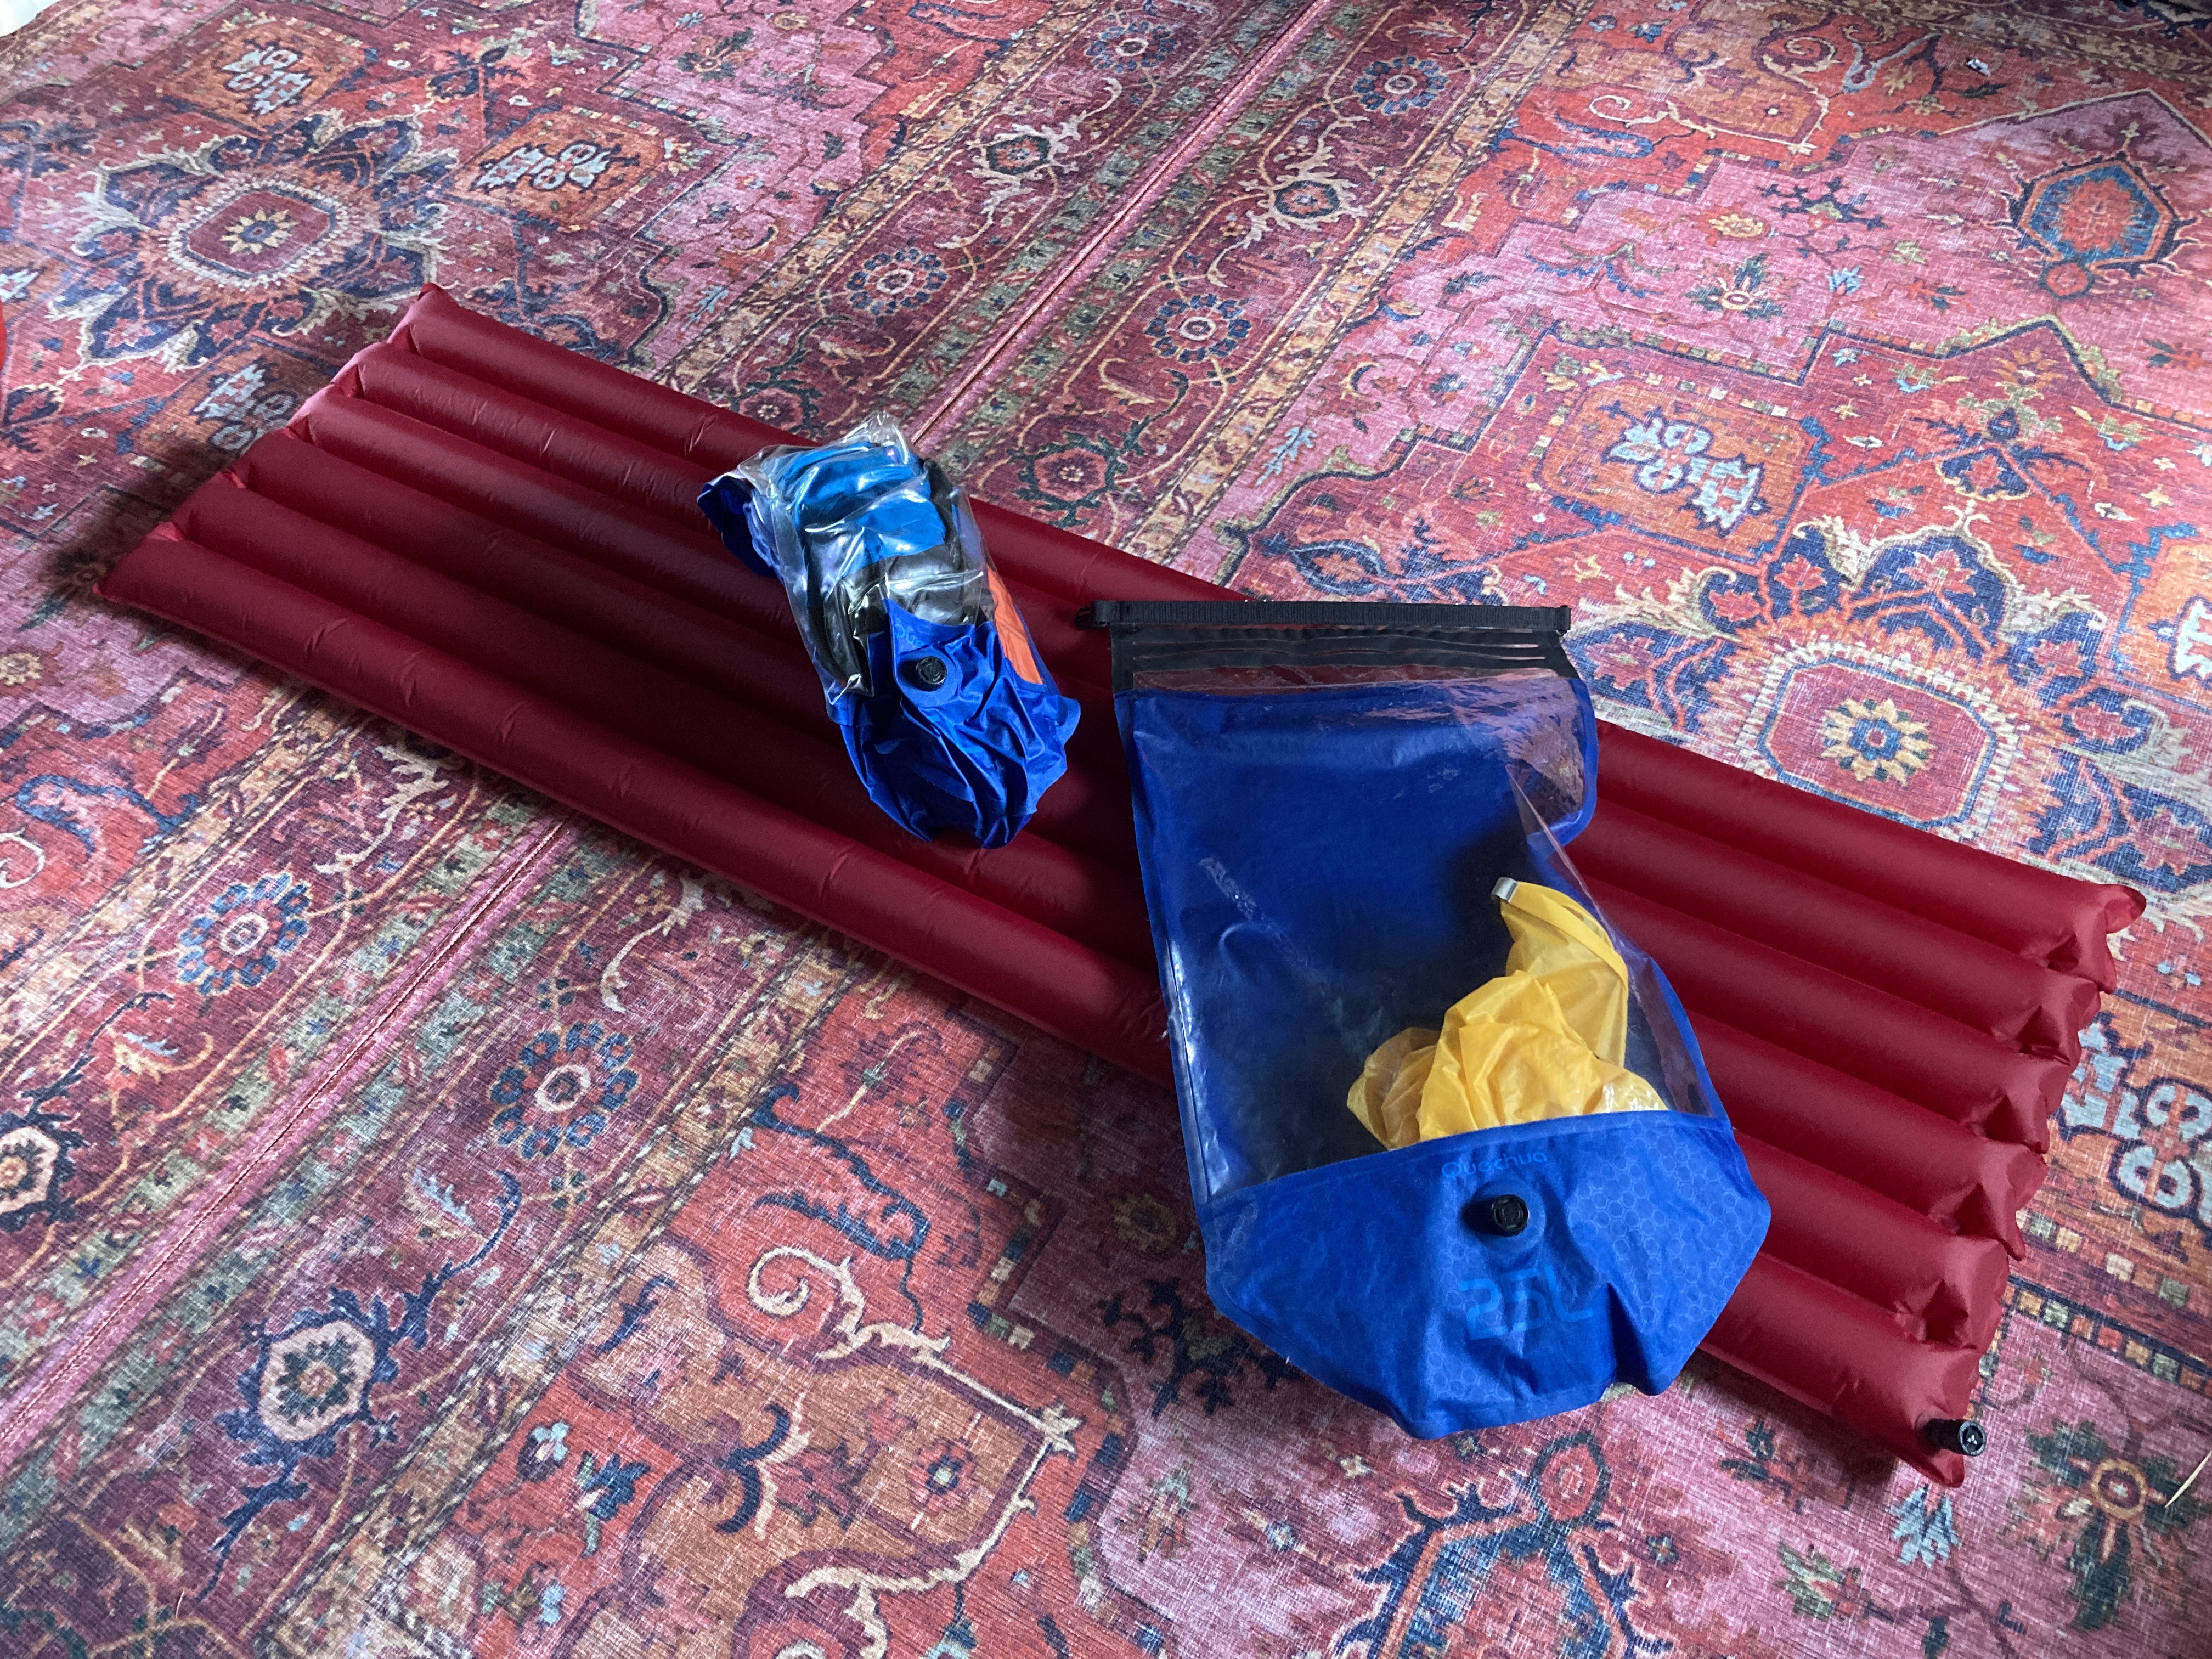
Compression dry bags (with window!)
Compression dry bags with a window are sold under the Quechua/Forclaz brands (Decathlon).
There is only one size (25L).
We first bought two compression dry bags for our sleeping bags in 2019.
They have a valve for letting the air out if you compress them. In compressed state they are much easier to pack
beneath the aft deck.
By accident we found out that they are very useful for storing clothes.
You can squeeze the air out with the valve and the window lets you see what is inside.
This makes these bags more practical for clothes than the roll-tops.
So we now have two of these bags for our sleeping bags and another pair for our clothes.
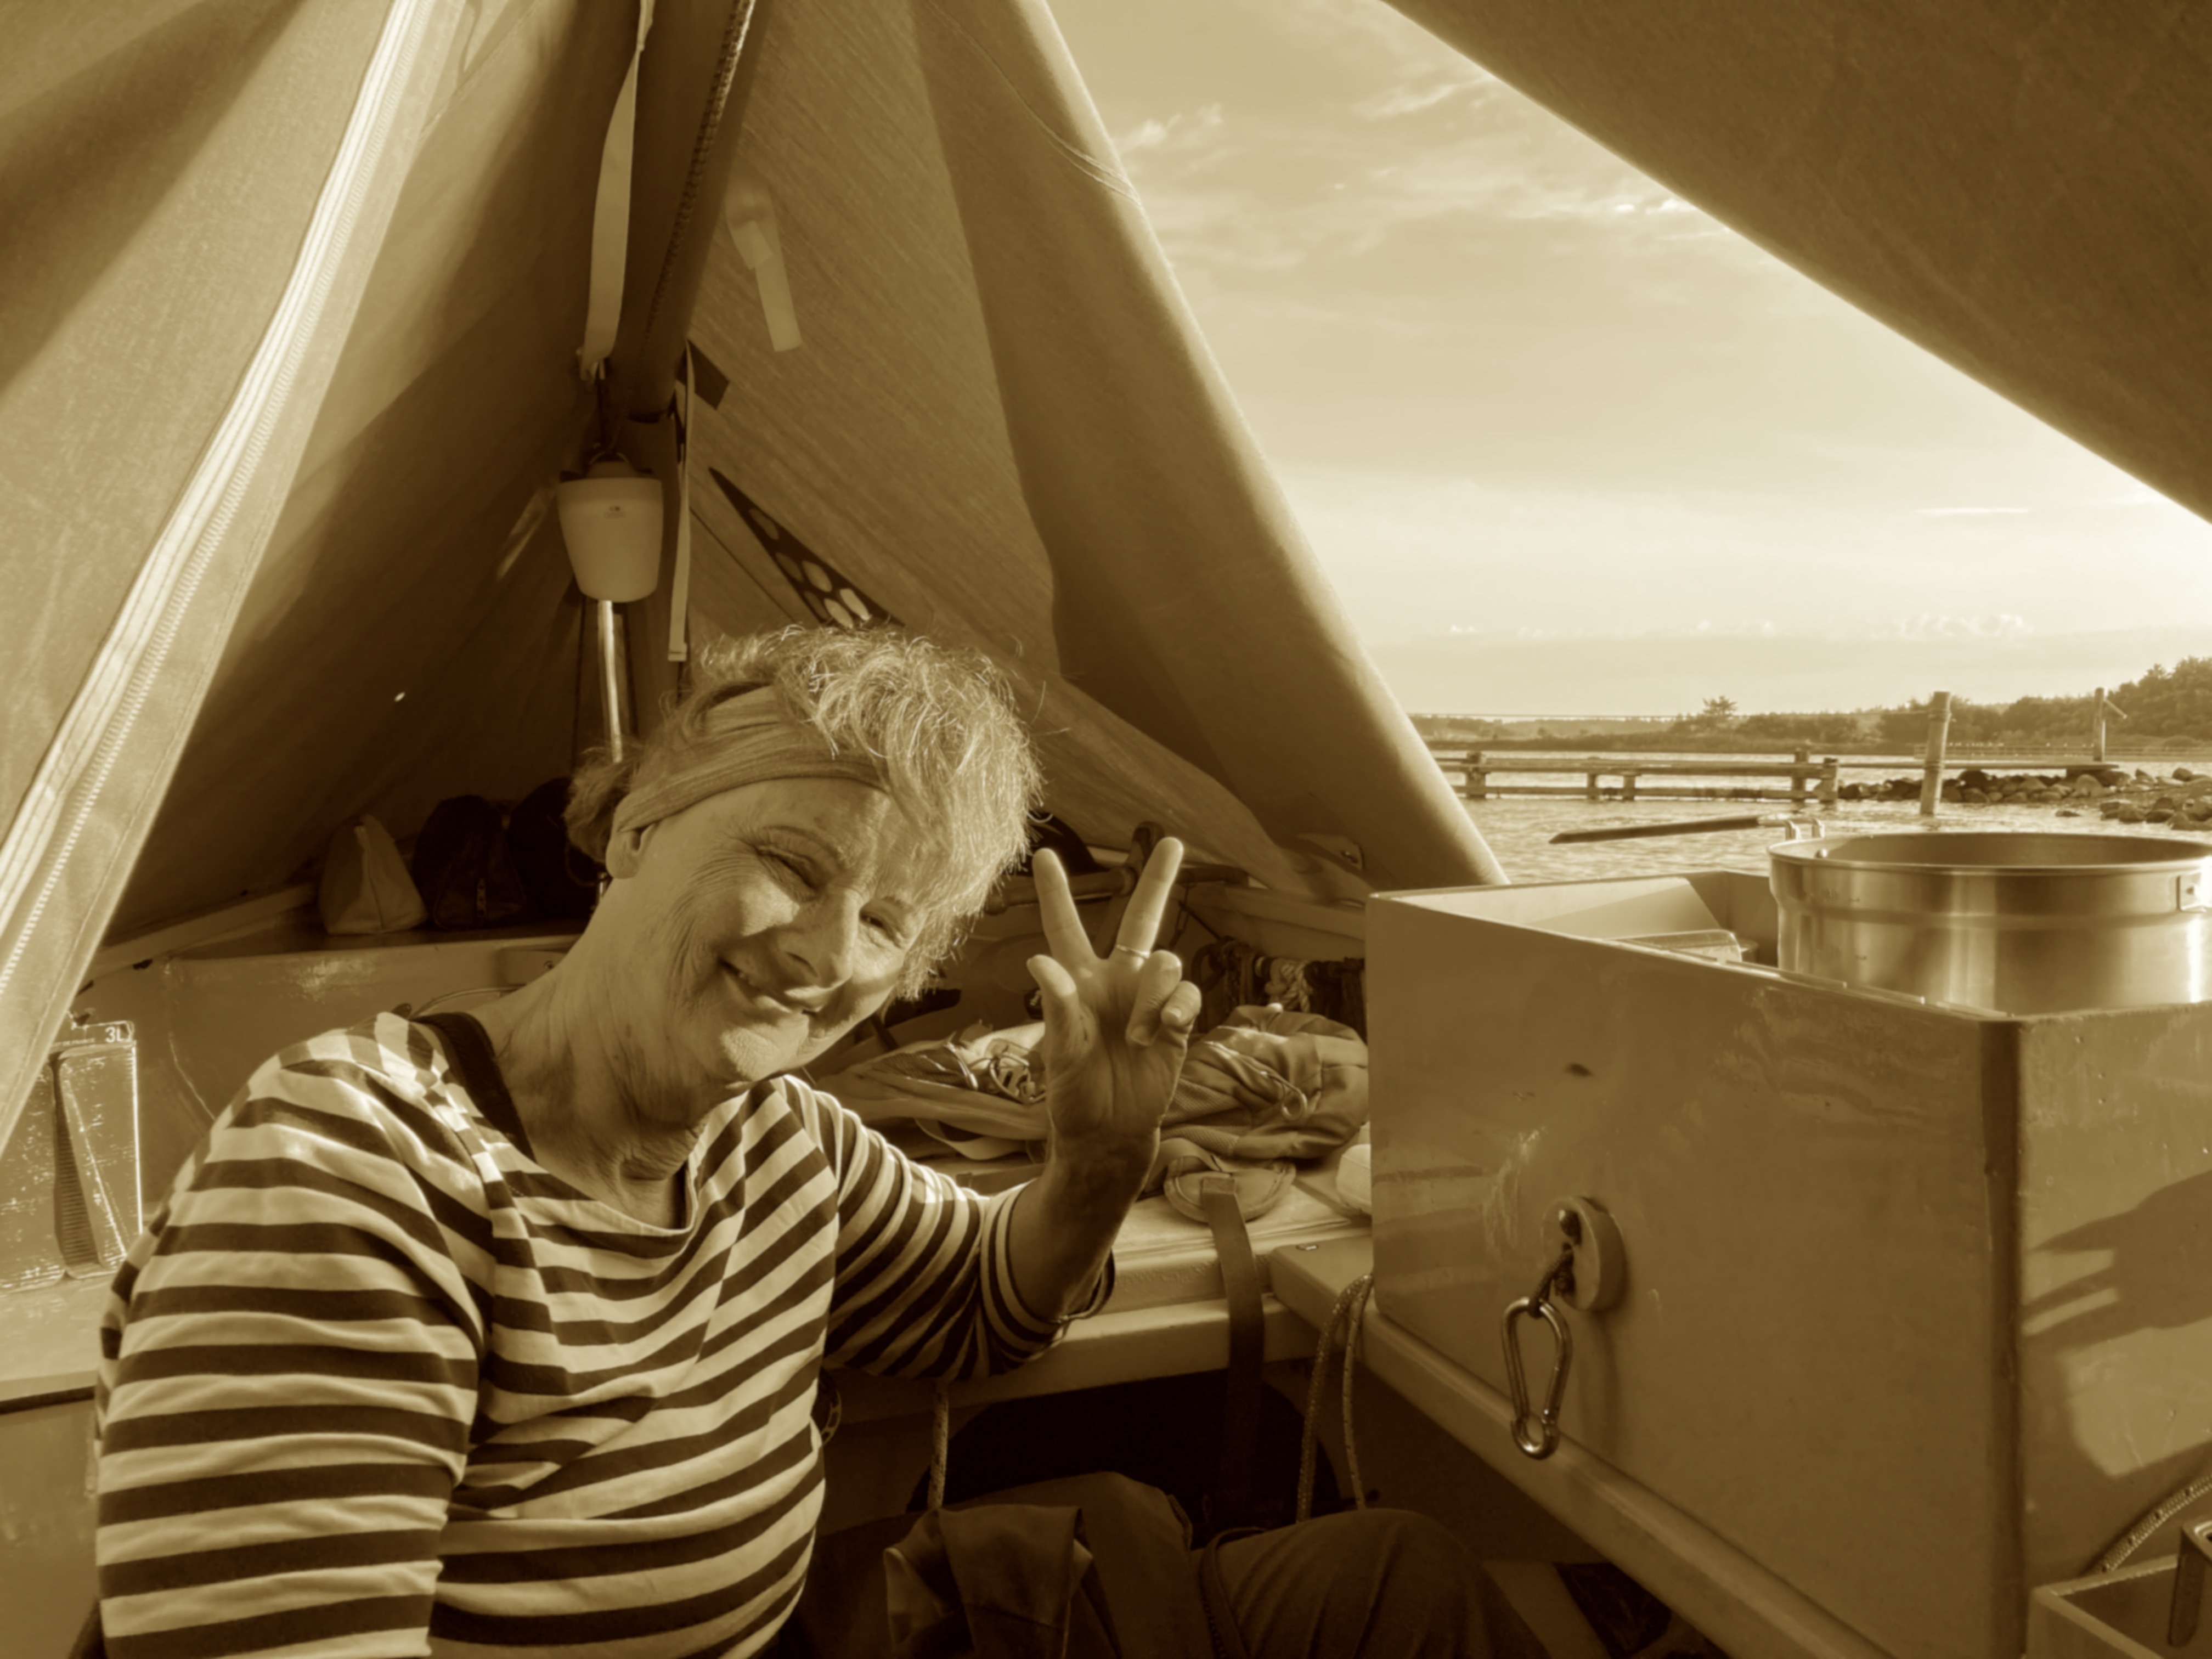
Sleeping on board
Sleeping two-up under the boat tent turned out to be very agreeable.
Converting Hatseflats from sailing to sleeping (or from sleeping to sailing) took us about an hour.
There are just so many small things to do in a small space that it is often quicker to do them singlehandedly.
My first job after tying up to the jetty would be to put up the boat tent and getting ready for cooking and sleeping:
- retrieve the boat tent, mast strut, and boom crutch;
- put up the boat tent on the lowered mast supported by the mast strut and the boom crutch;
- clean and dry the decks - the boat tent will now keep the rain out;
- move stuff from anchor well to the cockpit - we sometimes use the stout bucket in the anchor well at night;
- retrieve sleeping gear from underneath the aft deck;
- retrieve clothes bags, toiletry bags and camping light from underneath the foredeck;
- inflate mattresses in advance;
- ready for cooking on board (with half open tent) or on the dock;
Meanwhile Klarie would set out the chairs on the dock, fetch water and prepare the food.
We found that the sleeping platform hindered us while moving about in Hatseflats,
so we learned to put it in place just before going to sleep.
A couple of times the boat listed a bit to starboard.
Moving the heavy container under the port side greatly helped the balance.
We slept very well in our new down sleeping bags.
Our procedure to convert from sleeping to sailing was this:
- put sleeping bags into compression bags;
- deflate mattresses and pillows;
- disassemble sleeping platform, put slats and truss under port seat to make room;
- put sleeping gear in comprression dry bags;
- stow clothes bags, toiletry bags and camp light under foredeck;
- disassemble boat tent;
- raise mast;
- move boom crutch and mast strut out of the way;
- strap seats, truss, and boom crutch to port seat;
- stow sleeping gear and boat tent under aft deck;
- put sail bag and oars back on board;
- unpack sail bag and re-attach halyard and sheet;
- ready to tie off and go sailing!
Towards the end of our Limfjord cruise I accidentally punctured my VauDe mattress during the night.
Twice!
Both tears were caused by the sharp edge of an alloy rail in our sleeping platform.
Lesson learned: be sure to minimize sharp edges in your boat, especially in the sleeping quarters.
The last two days we had some rain during the day and overnight.
Our boat tent is made of polyester which is light and easily stowed.
If it rains, the inside of the boat tent eventually gets damp because of the condensation of two breathing humans
and cooking inside the boat tent.
Eventually the predictions for more rain made us decide to stop at Thisted and maybe come back another time.
Clothing
The trick is to minimize the amount of extra clothing.
Note that we already carry spare clothes under the aft deck.
Apart from our dinghy racing vests and sailing gloves, our clothing consists of
-
Outer garments
These are the clothes you are already wearing at the start of your trip:
a Tilley hat, lightweight trousers, sweater and fleece jacket.
My view is that you should always cover up when sailing.
Better to be hot than to burn! (I detest putting on sunscreen!)
On this trip I also brought a merino shirt (not used), a synthetic T-shirt with long sleeves (not used),
and a slightly oversized cotton shirt that I used to wear to the office long ago.
In the past I used a fisherman's smock which I found too bulky in the confines of the boat tent.
-
Underweaar
One change of underpants per day, one pair of socks and one or two singlets (isolation!).
-
Foul weather gear
Offshore sailing gear is too heavy and constricting.
Sailing boots are too bulky on a dinghy.
I use a lightweight CodeZero jacket and Gill dinghy trousers.
The foul weather gear, gloves, hats and racing vests are stowed under the bridge deck for quick access.
-
Footwear
We are wearing Crocs on board and boat shoes or sneakers when ashore.
Crocs are ideal on board because they are light, slightly flexible and have good anti-slip.
We used to pack our clothes in roll-top dry bags but are switching to compression dry bags with a window,
where you can see the contents from the outside.
Because we spend so much time in the same clothes we also carry a deodorant in our toiletry bags
when we are getting out and about.
Food and drink
For our trip on the Limfjord I packed our 26L container with enough food for two people for seven days.
Stowing both the galley box and food container under the starboard seat caused a slight imbalance
which went away when we moved the food container under the port seat.
Here is a list of some of the food we brought to the Limfjord:
Main food items for the Limfjord Cruise
| Item |
Useful? |
Comments |
| Two bags of creamy tomato soup |
N |
Only needs to be heated up. Adds too much weight. |
| Too sachets of dried tomato soup |
Y |
Add hot water and pasta, chick peas or whatever |
| Six disposable cups of pot noodles |
Y |
Add hot water. We added nuts for extra nutrients. The smaller plastic packets require less space. |
| Sliced wholemeal bread |
Y |
Eat within 2 days. |
| Blackcurrant buns |
Y |
Will last a week if needed. |
| Plastic jar with instant cappucino. |
Y |
We did not bring our Bialetti this time, The instant cappucino was drinkable. |
| Glass jar with peanut butter |
Y |
Suitable for lunch, palatable at breakfast. |
| Glass jar with sandwich spread |
Y |
Bit sour if used during breakfast |
| 24 tortillas wraps (3 packets) |
Y |
Substitute for bread. Also usable for wraps. |
| Couscous |
Y |
Only add hot water, supplement with vegetables/mushrooms for a good meal. |
| Rice |
Meh |
Requires sligthly more effort than couscous |
| Plastic jar with pasta |
Meh |
Requires sligthly more effort than couscous |
| Plastic jar with instant mashed potato |
N |
Watery if you add hot water, Sticky goo. |
| Four adventure meals |
Meh |
Only add hot water, no washing up required. Healthy but very expensive. Use as last resort. |
When it comes to drinking: we brought 2 Aptonia flasks, some Dopper bottles and a couple of 500ml bottles for water.
Our target was to drink at least one liter of water each during the day.
On sunny days this was hardly enough, so next time we will even bring a couple more.
We also brought a 3L container with French wine which we stowed under the bridge deck.
The wine container was both heavy and bulky, so we were having second thoughts about it.
On the upside, the four of us celebrated each day with a glass of wine in the evening!
Clearly our food container was too heavy and we did not even use all of its contents.
Next time we will try to travel light and bring more couscous, vegetables, mushrooms and
probably skip the rice, pasta, and instant mash potato.
We will also take an example from the
packing lists of our friends Richard and Cora for their walking trails
and have already bought ziploc bags to save weight.
Living in a small space
During our trip, our recurring challenge was to live in a very small space.
For example: before you could get the peanut butter from the bottom of the food container you would take out empty
most of its contents, get the peanut butter jar and put the other items back in.
A minute later you would repeat the procedure to get the sandwich spread from the container.
The same for getting a clean T-shirt from your clothes bag or a nail file from the toiletry bag.
The list is endless but it getting to your stuff takes a lot of time without proper cupboards!
We know that we can work around some of the problems by ruthlessly minimizing the stuff we take on board and
by getting the right gear like windowed compression bags.
Even then, dinghy camping is very much 'back to basics', and you will spend a much time on trivial tasks,
organizing and re-organizing your little space.
The reward for hard work, patience, and self-discipline is that we can trailer our small boat to pretty much
anywhere in Europe to enjoy a couple of days sailing and camping in the most beautiful surroundings.
Cooking on board Hatseflats
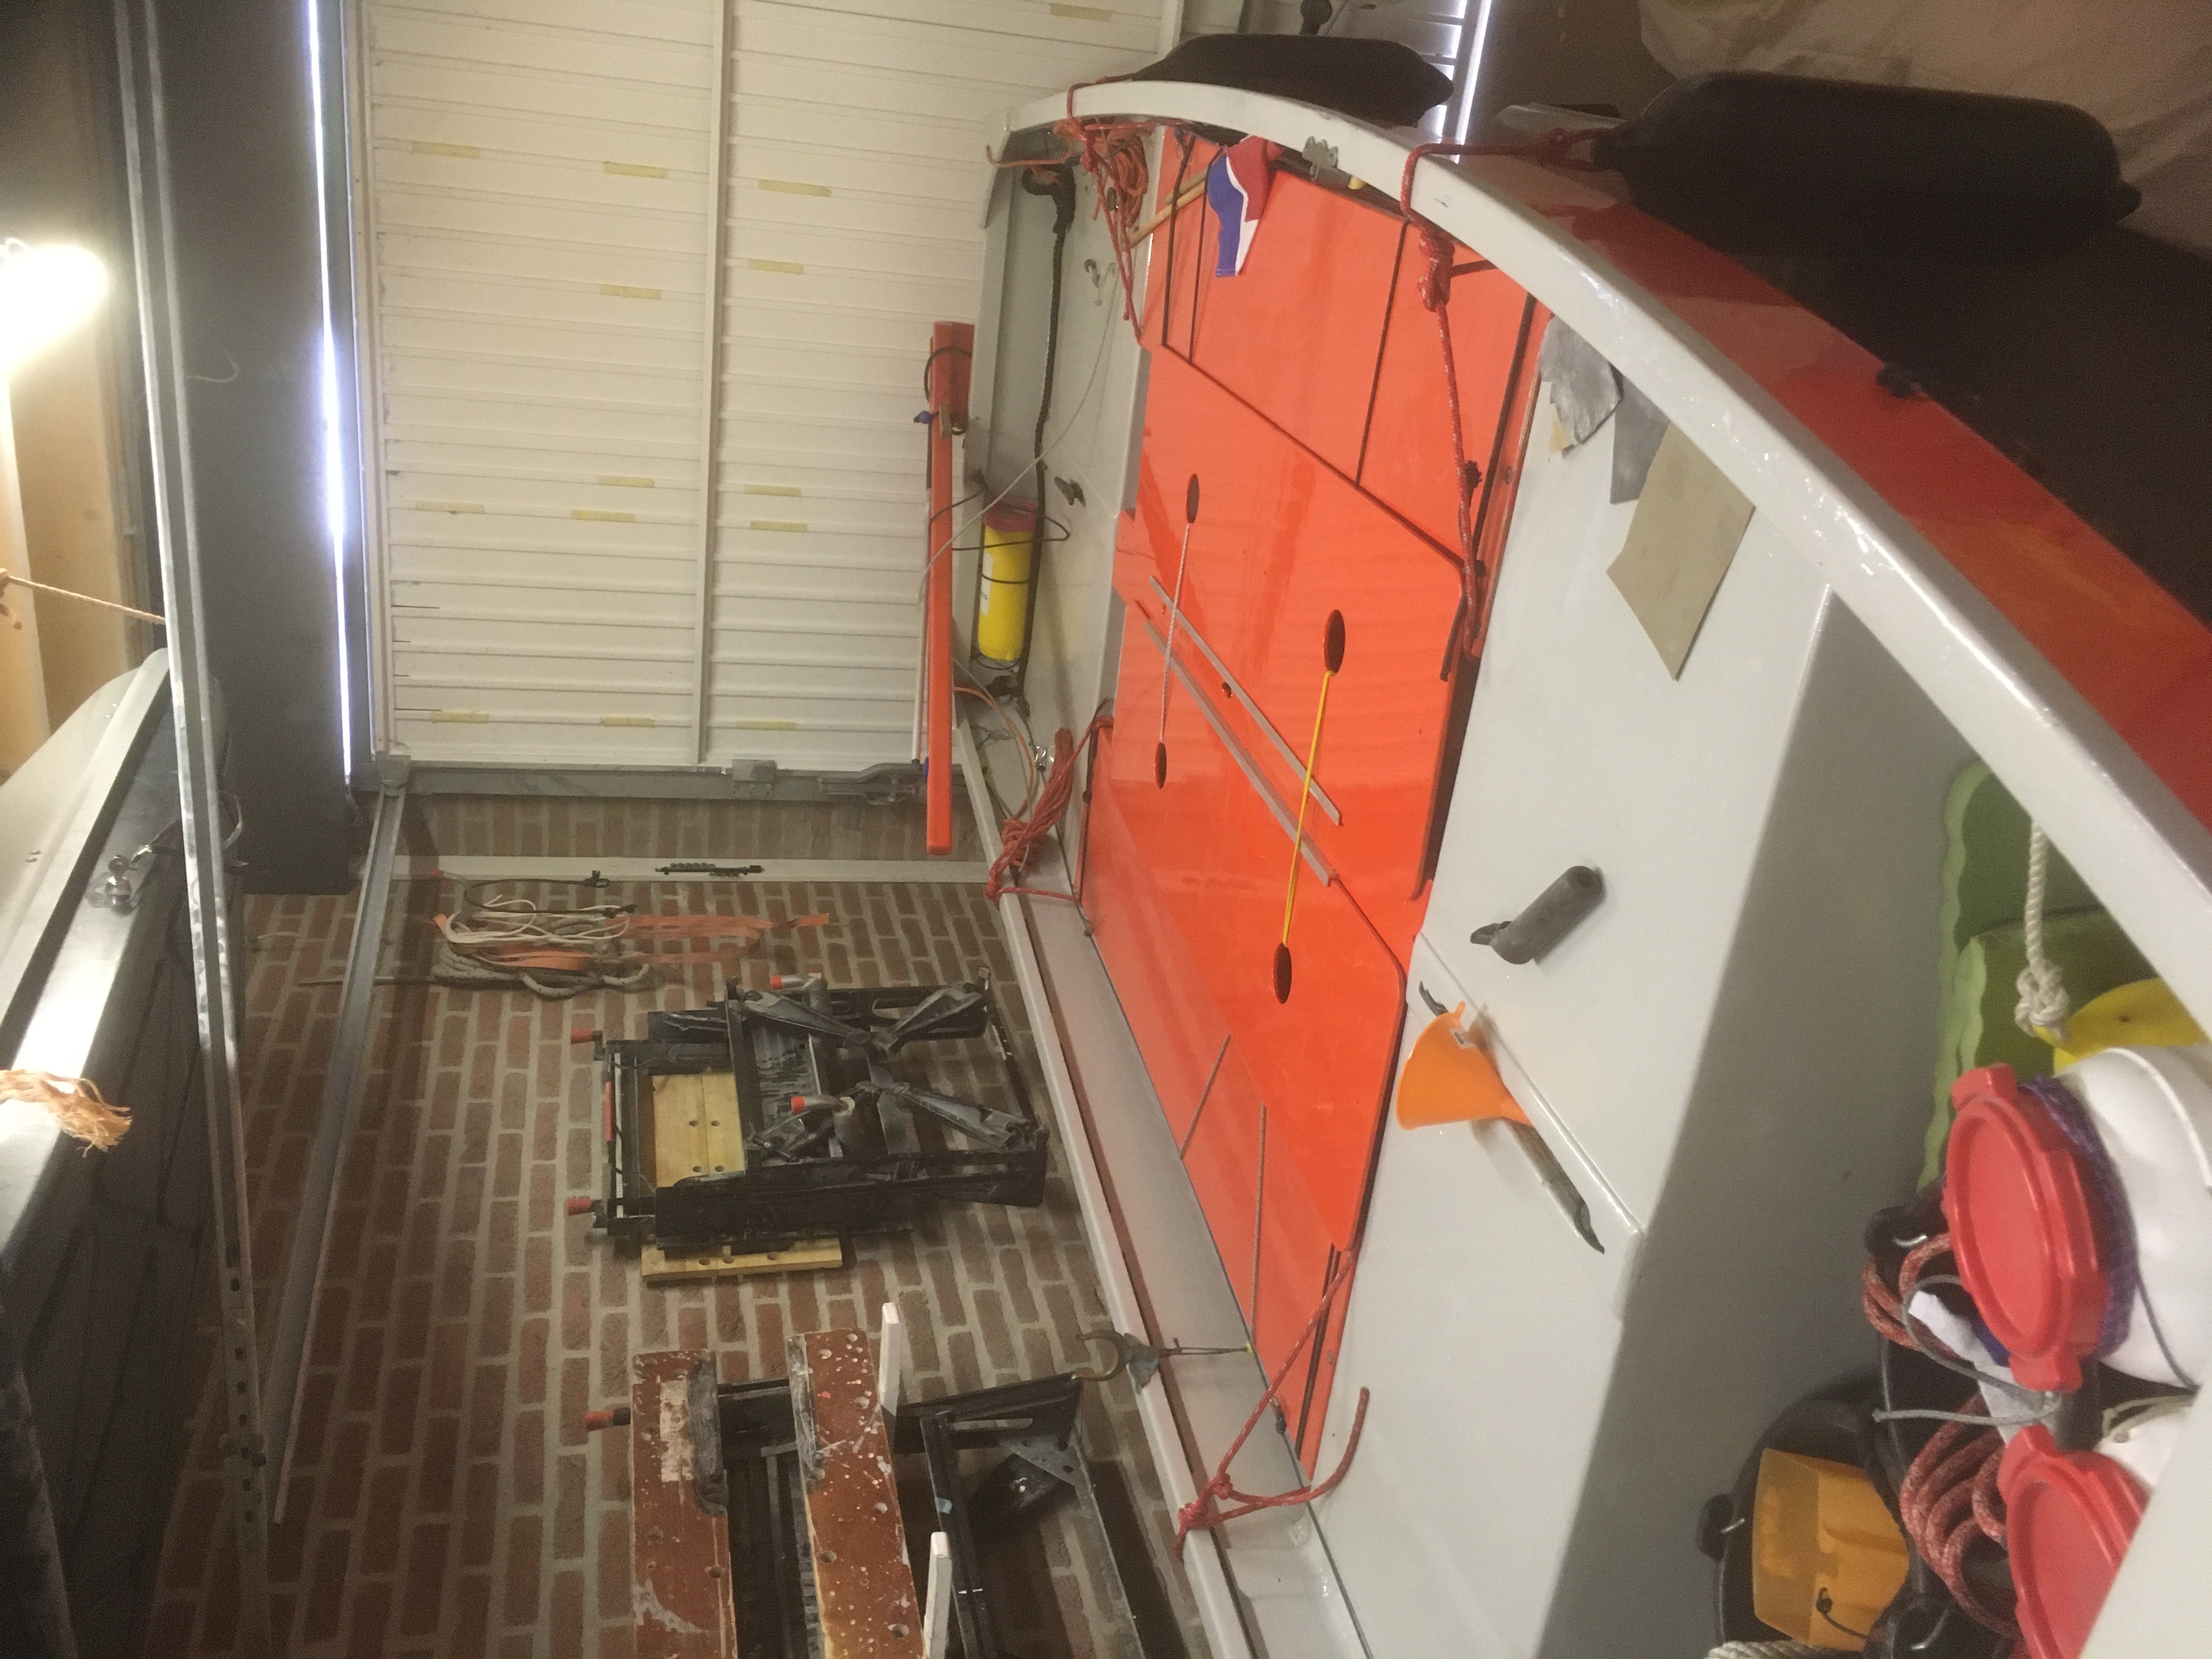
Sleeping platform: remove when not in use.

Not used:alloy foil mats.
Not used:our Ortlieb rack-packs.
Various roll-top dry bags.
Not used:our mega roll-top dry bag.
Useful:compact VauDe mattresses and compression dry bags (with window!)
|